Release Tension & Build Strength: A Practice for Your Lower Back
Wonderfully designed to provide both support and a wide range of movement, the human spine has a unique feature: its upright vertical alignment in the gravitational field. Human beings alone among all creatures have this capacity—the ability to sit and stand with their head, neck, and trunk on a vertical axis. Yet if we are to enjoy this unique heritage, we must develop and maintain the structural integrity and flexibility of the spine, beginning with the deep muscles of the back that run parallel to the spine and support its upright position.
Human beings alone among all creatures have this capacity—the ability to sit and stand with their head, neck, and trunk on a vertical axis.
In the lower back, the deep spinal muscles span the space between the twelfth rib and the pelvis, stabilize and mobilize the lower back, protect the abdominal organs, moderate and control forward bending, and assist in backward and side bending. They help support and maintain the normal spinal curve in the lower back, giving the spinal column its resiliency and capacity to absorb shock as it connects the pelvis and chest in alignment on the vertical axis. If the deep spinal muscles of the lower back are too tight, the lower back is too rigid to allow normal range of movement. If they are too weak, the structural support and upright posture of the body is compromised. Therefore it is important to release tension in the back as well as to build strength. The following set of poses does both. These exercises are intended to release minor tension in the back and to prevent more serious problems.
A balanced program of asana practice is the best therapy for long-term care of the whole back, since the mechanical function of the spine is affected by the strength, flexibility, and alignment of the whole body, including the legs, pelvis, and shoulders. For serious back pain, disk problems, or recent injury, consult your healthcare practitioner and a yoga therapist.
Reclining Twist
The reclining twists stretch the whole spine, but they are particularly effective for stretching the muscles of the lower back. There are many different variations; this one emphasizes the lower spine, legs, and inner thighs.
Lie on your back, knees bent and feet on the floor near the pelvis. The arms are extended from the shoulders, palms down. Cross the right thigh over the left, wrapping the legs tightly (if possible, catch the left shin with the toes of the right foot). Now lift the pelvis off the floor momentarily, sliding the left hip underneath and toward the center. Then lower the pelvis, twist to the left, and let the wrapped legs release toward the floor.

If you are very flexible you may be able to keep both the legs and the right arm and shoulder on the floor at the same time. For most people, however, the pose evolves over many practice sessions by alternately working with the twist in the lower torso (keeping the shoulder and arm firmly anchored) and then the twist in the upper torso (allowing the shoulder and arm to initially release from the floor, and then drawing them back). Whichever alternative you have chosen, breathe deeply into the abdomen as you center yourself in the pose. When you are ready, return to the center and repeat on the other side.
Locust Pose Variations
Muscle tone, strength, and flexibility are seldom equal on both sides of the body, and this is as true for the pelvis and lower back as it is for the arms and legs. These variations of the locust pose help restore muscular balance deep in the pelvis and realign the sacroiliac joint. They strengthen the muscles of the lower back and buttocks; they may provide quick relief to simple lower back discomfort, as well as prevent lower back problems from developing.
Muscle tone, strength, and flexibility are seldom equal on both sides of the body, and this is as true for the pelvis and lower back as it is for the arms and legs.
Lie on your stomach with the chin on the floor and the legs together. The arms are alongside the body, palms down. Bend the right knee and flex the ankle so that the sole of the foot faces up. Exhaling, lift the right thigh and press the foot toward the ceiling. Once the leg is raised, turn your attention to the left side of the body, relaxing the lower back, the buttocks, and the leg, and grounding the pelvis. This will isolate muscle contractions on the right, and you may not be able to lift the leg as high as before. For maximum benefit in this pose, adjust to the new height and carefully observe the contrast between the two sides of your body as you breathe out and in. Finally, release the right leg, noting any residual tension on the left side. Relax for three breaths and repeat on the other side.

Now bend both knees. Tighten the buttocks and press the lower abdomen into the floor. Exhaling, lift both thighs equidistant from the floor, keeping the chin down and the feet square. Keep the knees directly in line with the hips. Stretch up equally through the inner and outer edges of the feet, and out through the toes. Hold for three breaths, then gently release back to the floor. Repeat two more times. Watch your feet in a mirror, or have a friend watch you, correcting tendencies to rotate the toes out, lift one foot higher than the other, or tilt the feet.

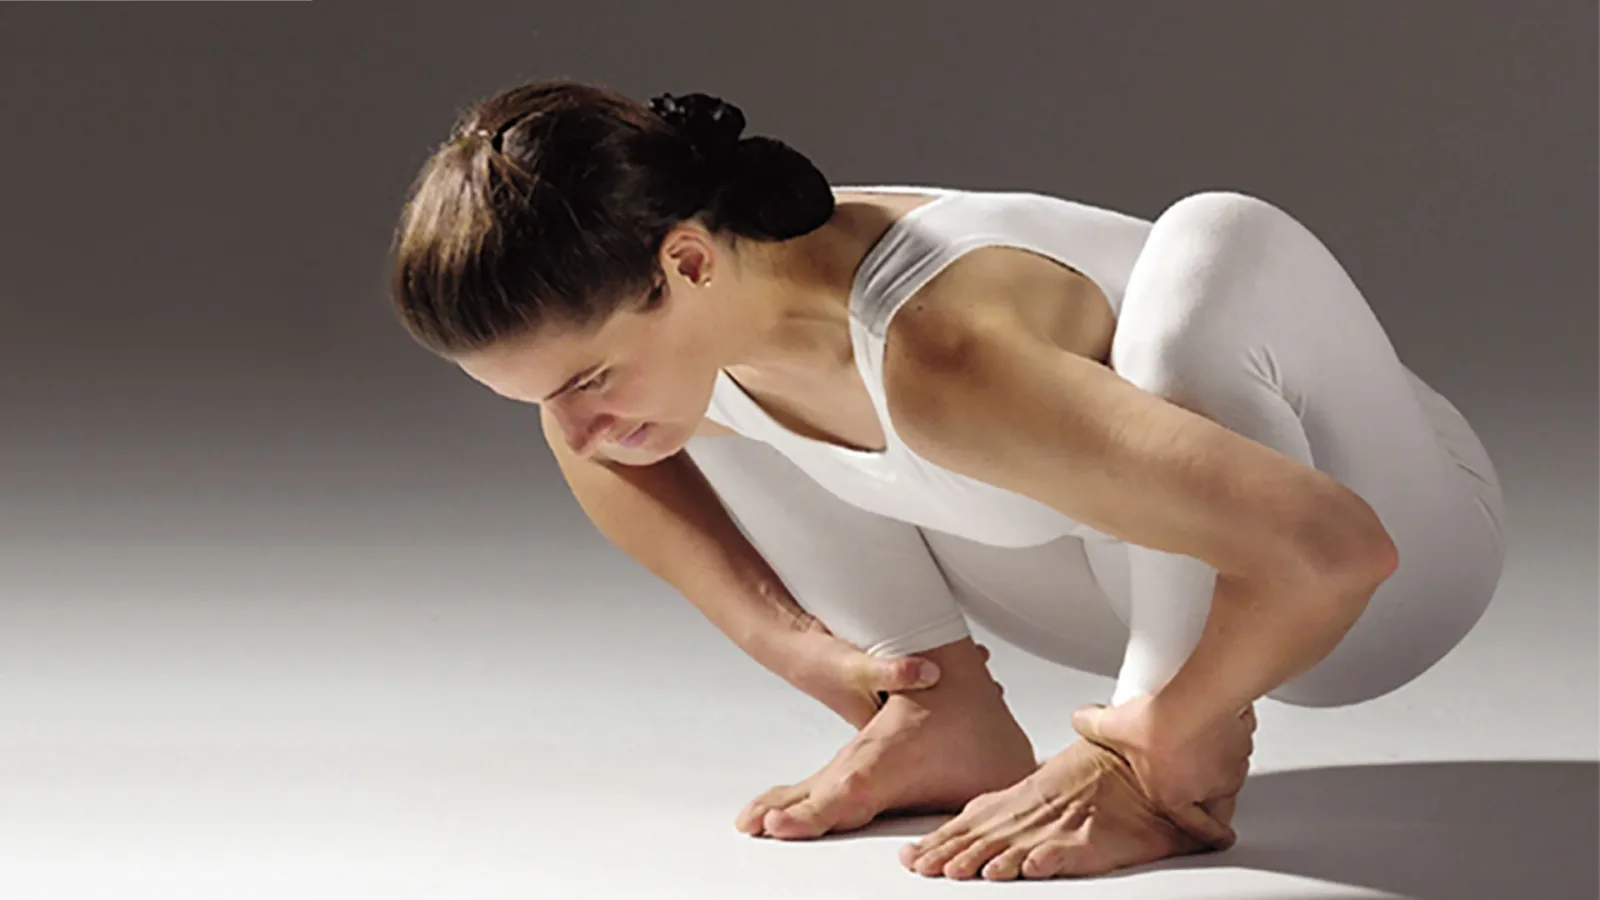
Squat Pose with Variations
Squatting poses are excellent for stretching and releasing tension in the lower back, developing elasticity in the ankles and knees, relieving tired legs, increasing flexibility in the hips, and massaging the abdominal organs.
Stand with the feet parallel and just wider than hips-width apart (this distance between the feet makes the pose easier, while narrowing the distance makes the pose more difficult). Bend the knees and lower the pelvis toward the floor into a squatting pose. Allow the heels to come off the floor if necessary to keep your balance, but maintain the alignment of the feet. If your knees feel strained, check your foot alignment again or redistribute your weight. Drop down through the heels and the tailbone, while at the same time stretching the torso up and forward. If you have come all the way down with the heels remaining on the floor, then spread the knees and place the hands on the floor, arms between the legs. Hold and breathe.

If you are uncomfortable, or if the heels don’t reach the floor, try either of the following modifications. Start by placing a firm folded blanket or mat under the heels. Lower the heels onto the support and open the knees, keeping the feet pointed straight ahead. Folding at the hip joints while broadening and flattening the lower back, extend the torso forward between the thighs. Then hold and breathe, relaxing more deeply into the pose. A second method for lowering the heels in the pose is to spread the knees and hold on to a stable support (a low ledge, railing, or piece of heavy furniture will do). Use the support to counter falling backward as you lower the heels further toward the floor. Once in the pose, lengthen and flatten the spine and lower the torso between the legs, continuing to use the support to maintain the pose. Hold and breathe.

If you can bring the soles of the feet flat to the floor, then the next challenge is to gradually bring the feet together. At any point in the process it may help you to momentarily lift onto the balls of the feet, open the thighs, and press the torso forward and down. Then release the heels back to the floor again. Once you can bring the armpits inside the knees, spread the elbows to the sides and grasp the outer ankles with the hands. If possible, lower the head and the tailbone toward the floor.

Adapted from Yoga: Mastering the Basics by Sandra Anderson and Rolf Sovik, PsyD. © Himalayan Institute.