Five Things You Might Not Know About Warrior I
Digging into the alignment of warrior I is like opening Pandora’s box. The complexity of the pose raises a number of questions, a few of which are particularly thorny:
Am I supposed to square my hips?
How long should the stance be?
How much should I turn my back foot out?
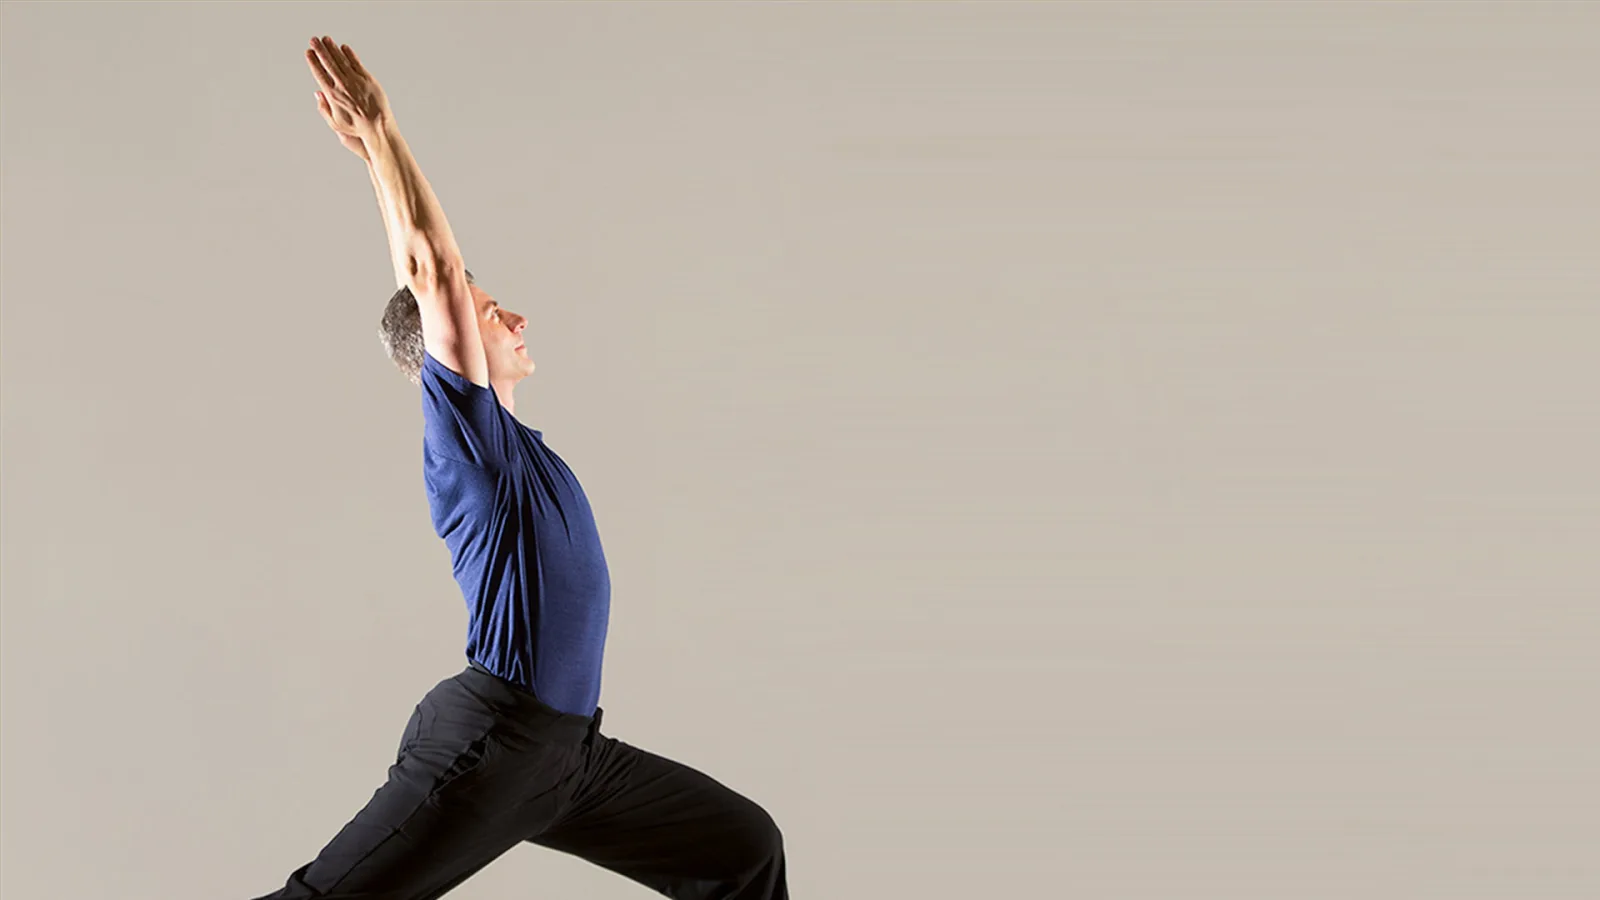
In fact, the difficulty teaching warrior I has led many teachers to abandon it in favour of its more straightforward sibling, high crescent lunge. Both poses open the hip flexors, improve balance, and prepare the body for more challenging poses such as inversions and backbends. The two are pretty much identical, save for one key difference: In warrior I, you plant your back foot flat on the floor diagonally, while in high crescent lunge you turn your back heel straight up to the sky.
This small adjustment in the position of your foot is significant. When your back foot is turned flat, it forces your back leg into external rotation, which makes it virtually impossible to square your pelvis forward without twisting the knee or collapsing the foot. While each body is unique and the amount of “squaring” possible is different for each person, in a group class setting it’s hard for a teacher to give each student the personalized cueing needed to find their best expression of the pose.
By understanding the following common alignment myths about warrior I, however, you can empower yourself to explore the pose safely—which will then help you find your own optimal warrior.
Myth 1: Square your hips completely forward in warrior I.
As I mentioned above, when you place your back foot flat on the floor diagonally in warrior I, the position of the foot brings your back leg into external rotation, which “unsquares” your pelvis. If you force your pelvis to square to the front of the mat when in this position, you risk collapsing the inner edge of your back foot and inadvertently twisting the knee.
Solution: Keep the back leg in external rotation. This means that you will keep your back thigh turned out at the same angle of your back foot as you turn your pelvis toward the front of the mat (only turn your pelvis to the extent that you can without changing your back leg). Work to your own capacity and expect your hips to be angled slightly open. You will need to engage the glutes of your back leg moderately to keep your back thigh and shin bone aligned with the angle of your foot. Be careful not to overclench the glutes so that you can continue to lengthen the sitting bone down. This slight externally rotated position of the back leg ensures that the knee does not twist. Maintain this, and press into the outer edge of your back foot to lift your back inner arch.
Myth 2: Turn your back foot out 45 degrees.
The degree to which you can turn your back foot out depends on the openness of your calves. While 45 degrees is an accessible and appropriate angle for many practitioners (which is why most teachers will default to cueing it), it will not be ideal for every body. If you have very open calf muscles, you may even be able to turn the back foot in in order to bring it more parallel with your other foot and still keep the heel down (but be careful not to turn it too much, or you will compromise your balance). However, if you have tight calves (as I do), you may not be able to get the whole foot to the floor when it’s turned 45 degrees.
Solution: To release the tension in the calf, turn your foot wider than 45 degrees. Remember, however, that you will also have to commensurately externally rotate your back leg to keep your thigh, shin, and foot aligned, which will cause your hips to be less square. If you find that you need to turn your foot out more than 70 degrees to accommodate your calf, then you may consider lifting your heel (see myth 3).
Myth 3: Always keep your back heel down.
While turning your back foot wider than 45 degrees will release tension in the calf, it will also make it more challenging for you to work your hips toward “square.” If the back foot is at an angle that's greater than about 60 degrees, you will begin to lose the essential action of the pose, which is to engage the adductors and work your hips toward square. However, if you have tight calves and try to turn the foot forward, your back heel may lift.
Solution: If you have tight calves but don’t want to externally rotate the back leg to too great a degree, try placing a chip foam block or yoga wedge beneath your back heel and keeping the foot at a 45-degree angle. The extra lift will help you anchor your heel, while giving you more space to work the hips toward square.
Myth 4: Place your feet heel to heel.
The feet are traditionally aligned heel to heel in warrior I. However, this tight positioning can make it challenging to balance. It can also be taxing on the hips, calves, and knees.
Solution: Explore taking the feet hip-distance apart (think railroad tracks rather than tightrope) to open up the pose and find more stability through your foundation. As your balance and stability in the pose increases, only then consider bringing the feet closer.
Myth 5: Bend your front knee to a square.
While the ideal form of the pose may be to bend the front knee to a 90-degree angle, this position may simply be impossible for those of us with tight calves. Also, if you have tight hip flexors, you may find that bending the knee to a square overly compresses your lower back.
Solution: Shorten your stance. By shortening the distance between the feet, you will decrease the pull on the hip flexors and allow more space to keep the tailbone lengthening downward and the lower back spacious. Also, the shorter stance will decrease the pressure on your back calf. Or you can keep your stance long, but hinge your torso forward slightly to bring the spine in line with the angle of your pelvis. While this will not help tight calves, hinging forward will take the compression out of the low back and give you more space to lengthen your spine.
Because warrior I is a complex pose, it’s also an exciting opportunity to discover the unique capacity and needs of your own body. Playing with these options in your practice will help you find your own individualized warrior. Happy exploring!