Why Knees, Chest, Chin Is Not a Chaturanga Alternative
Knees-chest-chin is not a chaturanga alternative. There, I’ve said it.
I recognize that this statement may be a bit controversial in the yoga world, as traditional ashtanga namaskara (or ashtangasana) has been commonly accepted as an alternative posture to chaturanga dandasana (otherwise known as “low plank” or the “yogic push-up”). Many teachers of dynamic yoga styles (such as Ashtanga or vinyasa flow) teach knees-chest-chin as an alternative to chaturanga—both for those who do not yet have the strength to practice the challenging posture in its “full” form, and for practitioners who may feel too tired to practice a traditional chaturanga.
However, when we consider the anatomy of both ashtanga namaskara and chaturanga dandasana, we find numerous reasons why knees-chest-chin is not an appropriate substitute for chaturanga.
1. Knees-chest-chin reinforces the most common misalignment in chaturanga.
One of the most common misalignments in chaturanga is dipping the shoulders below the elbows. Chaturanga is a very tricky posture, as there is so much to keep in mind anatomically while practicing. Because it is a weight-bearing pose, one of the most important aspects of chaturanga alignment is to maintain the integrity of the very mobile shoulder joint. This can be achieved by keeping the head of the humerus (the upper arm bone) in its “perfect fit” within the shoulder socket. This means not allowing the front of the shoulder to dip below the elbow joint, as that action places too much weight (and, therefore, pressure) onto the joint of the shoulder itself. Ideally, you never want the front of the shoulder to be rounded in a downward-facing direction when practicing chaturanga.
But when you take knees-chest-chin, that is exactly what happens within the shoulder joint. By first placing the knees to the ground and then keeping the tailbone lifted as the chest is released to the floor, the head of the humerus reaches far below the elbow joint—causing your shoulders to round down toward the floor, and “dumping” the weight of the torso (including the forward momentum of the movement) into the delicate shoulder joint. This is not the safest action for the joint. And it also continuously reinforces into the practitioner’s muscle memory of the exact movement of the shoulders we want to avoid when practicing chaturanga dandasana.
2. Knees-chest-chin places unnecessary pressure on the cervical and lumbar spines.
In addition to placing undue pressure on the shoulder socket, the position of having the knees and chest touching the floor with the tailbone reaching skyward places the body into a fairly deep backbend that for many practitioners can cause compression in the lumbar spine (lower back). And there’s more: By releasing the chin to the floor, the posture creates a hyperextension of the cervical spine, crunching back through the neck—which, depending on the biomechanics and mobility of the practitioner’s body, can cause even more compression. The posture also reinforces another far-from-ideal movement pattern in yoga: an overextension through the neck during backbends.
3. Knees-chest-chin doesn't build the strength necessary to eventually practice chaturanga.
Knees-chest-chin reinforces a “collapse” within the shoulder joint, creating muscle disengagement that certainly does not help to strengthen muscles (such as the supraspinatus, infraspinatus, teres minor, and subscapularis of the rotator cuff, which serve to stabilize the shoulder joint) in preparation for chaturanga. Furthermore, by first placing the knees on the floor and releasing the chest down, all while keeping the tailbone lifted, the core becomes disengaged and fails to support the forward and downward movement of the torso. Gravity is doing the vast majority of the work in this position. A yogi could potentially lower into knees-chest-chin for a lifetime, trying to work toward chaturanga, but never build the strength necessary to get there.
So, what can you do when chaturanga is out of reach? There are many alternatives that will help to keep your alignment spot on and help you to build the strength necessary to practice the challenging low plank. You could begin with these:
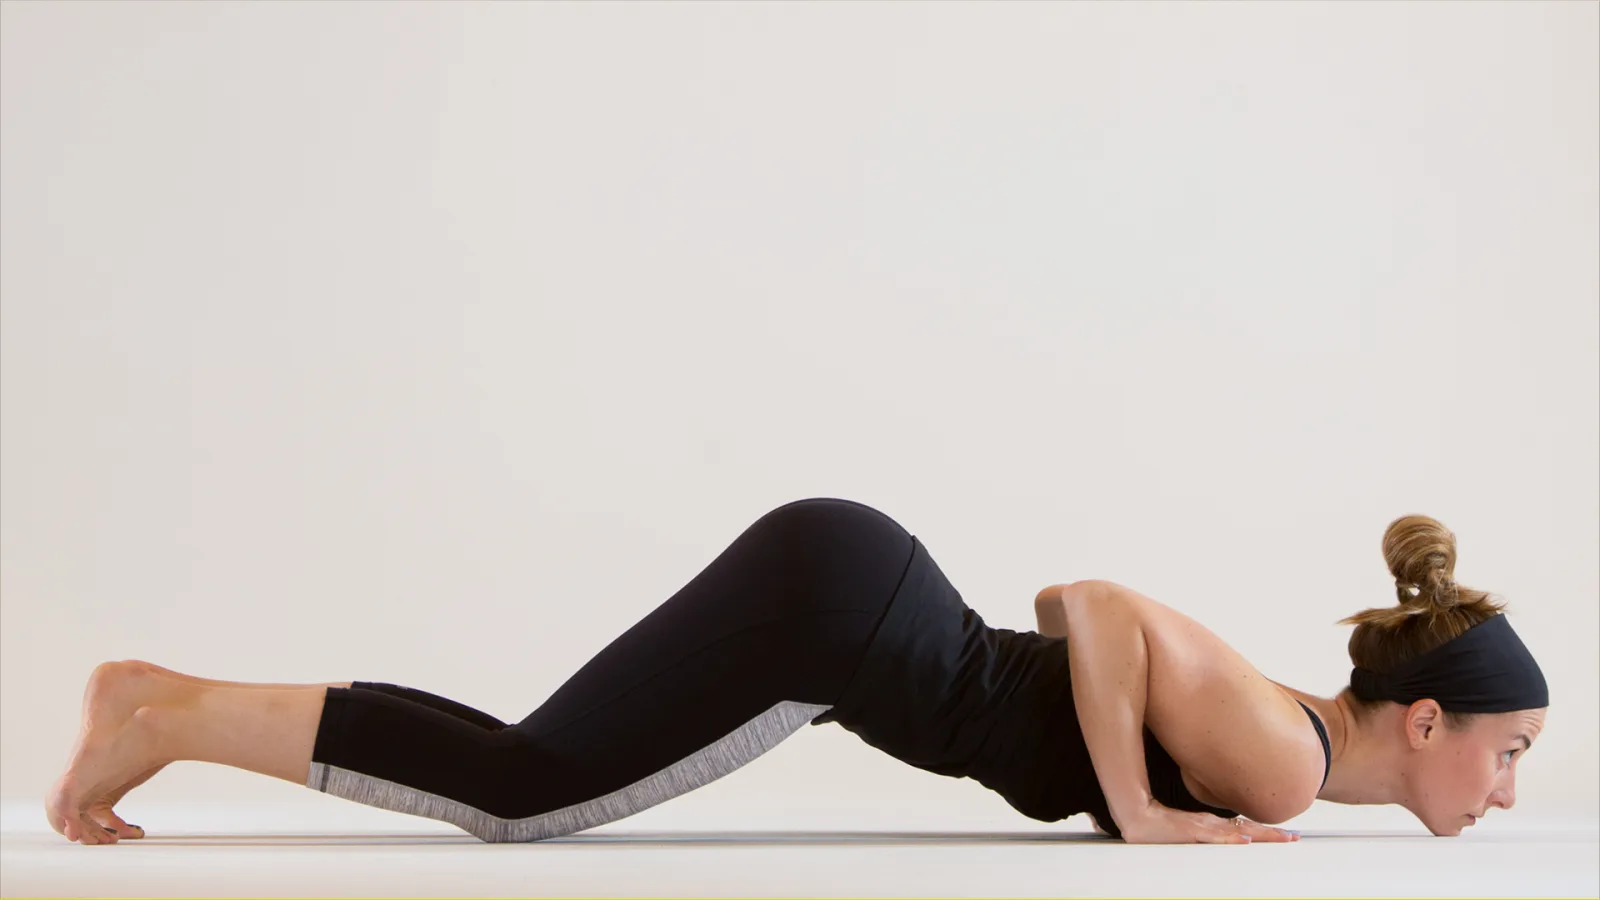
1. Knees Down, Lie Down
This is likely one of the easier options to substitute for chaturanga, so it can be practiced by beginners and advanced practitioners alike. This transition is actually quite similar to knees-chest-chin and can easily be used in its stead, but it has a few remarkable distinctions.
To practice, begin in a high plank position and softly lower your knees to the floor without bringing them forward, so that your knees land behind the line of your hips. Activate your core so that your belly and hips do not sag toward the mat, instead creating a strong, long line from the crown of your head to your seat. Depending on your own body mechanics, you will either be able to shift the weight of your torso slightly forward to start, or you may need to slightly bend your elbows to then be able to shift your weight forward. In either case, move your shoulders forward past the crease of your wrists. Keeping your core firm, begin to bend your elbows, pointing them toward the back of your mat (as opposed to pointing them out to the side like a traditional gym push-up), and slowly release all the way down to the floor in one piece, resisting gravity on the way down. Do not lift your tailbone or arch your back. To maintain length through your neck, look slightly forward instead of down. Be aware of your shoulder joints. Do not let the head of your humerus bones point downward toward the floor. Focus instead on lifting up out of the shoulders as you carefully release your torso down. Use the opposition of forces to build strength through the shoulders and the surrounding, supporting muscles.

2. Chaturanga Over a Bolster
Another “easier” alternative to chaturanga, this position requires the use of a bolster, which admittedly may not always be available or accessible in a fast-paced flow practice. But this is an excellent option for learning the muscle memory needed for full chaturanga without the burden of too much weight-bearing.
To practice, begin in a high plank position with a bolster placed underneath your chest, running lengthwise on your mat (so the long side of the bolster is parallel to the long side of your mat). Activate your core, and again (depending on what works best for your body), either first shift your weight forward or slightly bend your elbows and then shift so that your shoulders have moved past your wrist creases. Lengthen from the crown of your head to your heels; and as you exhale, slowly bend your elbows. Focus on maintaining height in the head of your humerus bones so that they do not dip below your elbow joints. In fact, keep your chest so broad and open that the fronts of your shoulders are actually facing forward (rather than down toward the floor). Maintain your core strength as you lower your torso to rest over the bolster. Allow the bolster to support the majority of your weight, but maintain the engagement throughout your body to build strength in this position.

3. Chaturanga Over Blocks
A slightly more challenging variation than the bolster version, working chaturanga over blocks is an excellent way to strengthen all the right muscles and build muscle memory for the propless version of the pose.
To practice, once again begin in a high plank position, this time with two blocks slightly forward of your hands. (Note: The height of the blocks will depend on your own dimensions, so you may need to experiment with the correct level for your body—but typically, the blocks will be at their highest level.) Work all the same actions described in the previous options: Activate your core, elongate from head to toe, and shift your weight forward until your shoulders move just past your wrists. From here, once again bend your elbows directly toward the back of your mat as you lower in one piece (the back of your skull aligning with your tailbone) to rest your shoulders onto your perfectly placed blocks. Make sure that the height of your blocks does not allow your shoulders to move below the line of your elbows. Ideally, you'd like to create an angle that is slightly greater than ninety degrees between your shoulders, elbows, and wrists.

As you begin to advance with this option, you can even practice hovering your body just above the blocks without ever making contact (i.e., finding chaturanga with the blocks there to support you only if needed).

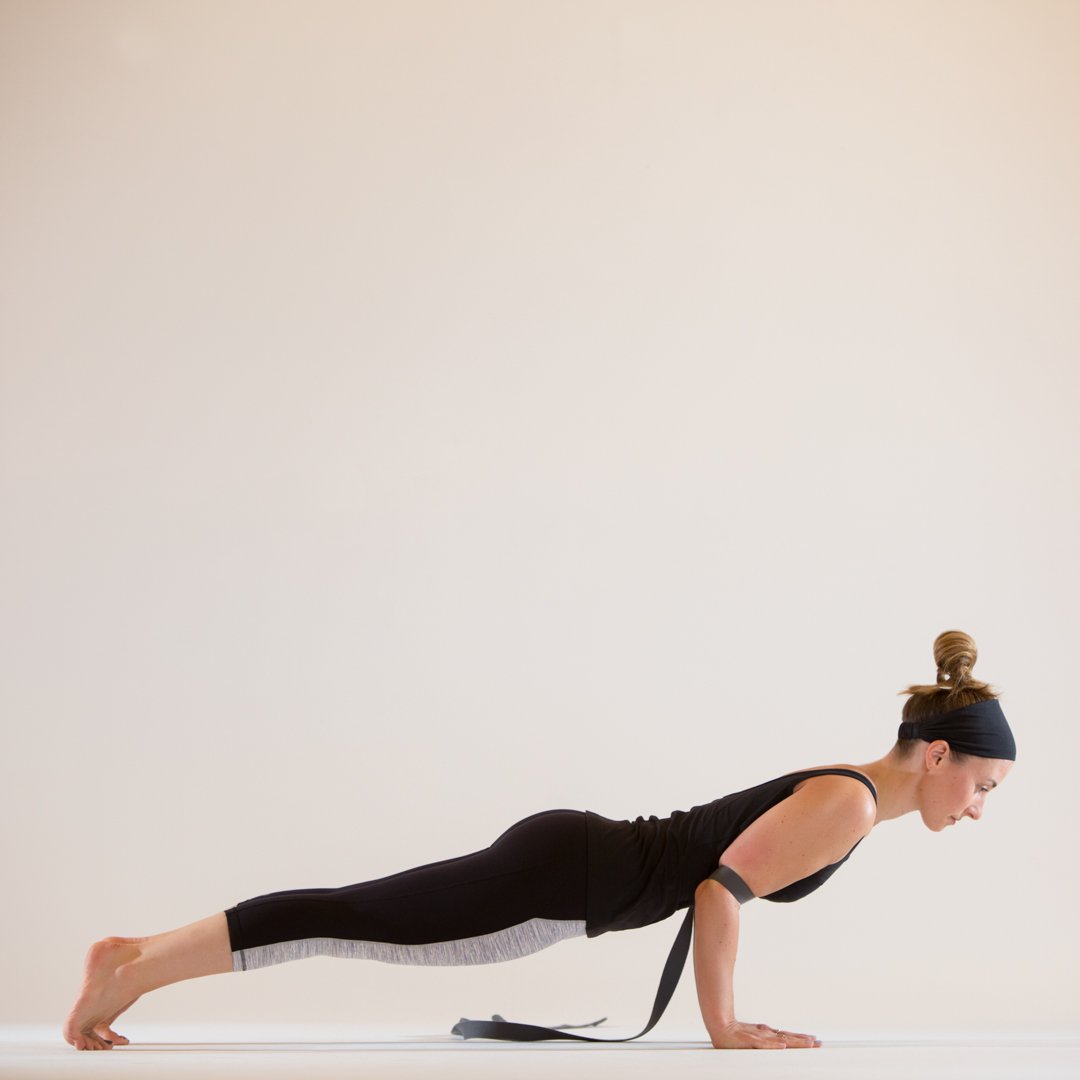
4. Chaturanga With a Strap
This option is a bit more advanced, and it helps you to find the precise angle of the arms that is ideal for your chaturanga.
To practice, follow all the same steps for the previous postures, but this time, loop a yoga strap around your upper arms (just above your elbows). Tighten the strap so much that when you draw your arms apart from each other, the taut strap will force your arms to be exactly shoulder-width apart. Once again, start in a high plank, engage your core, and shift your weight forward so that your shoulders have moved beyond your wrists. Maintain the length of your body; slowly lower yourself in one piece toward the floor; and point your elbows straight behind you while resisting your arms against your taut strap. You’ll reach a point at which your strap stops you from moving any further. This stopping point is where your shoulder joint is still integrated, and your shoulders are slightly above the line of your elbows. Kick back through your heels, hug in on your core, and maintain the long line throughout your body.
5. Half Chaturanga Push-ups
In my opinion, these can be just as difficult—if not more difficult—than traditional chaturanga dandasana. But they help you to create the strength and muscle memory needed to practice chaturanga, along with other challenging poses such as arm balances and inversions.
To practice, start in plank and lower your knees to the floor. Check over your shoulders to make sure that your hips are not dipping toward the mat; instead, activate strongly through your core and maintain a long line in your body from head to seat. In whatever way works best for you, shift your weight forward until your shoulders move past your wrists. As you exhale, bend your elbows as you lower in one piece, slightly less than halfway toward the floor (making sure to keep your shoulder joints above the line of your elbow joints with the heads of your humerus bones still pointed forward). Maintain your strong core, your lengthened torso, and your elbows drawing in, and inhale to press the floor away from you, rising all the way back up into your knees-down plank position. Practice as many (or as few!) as you would like.
As you start to build more and more strength and body awareness, you can try to practice this with one or both of your knees off the mat. And voila! You have found your ideal chaturanga dandasana alignment.
In my opinion, knees-chest-chin does more harm than good. For many practitioners, it’s neither a safe posture on its own, nor is it an effective alternative to chaturanga dandasana. Instead, I encourage you to try one of the alternatives mentioned above. Your body will thank you!