A Sequence for Healthy Hips
There is a global health issue that the greater fitness community can either address or continue to ignore. Musculoskeletal pain is on the rise, and movement educators are at the precipice of providing solutions or accelerating damage. The easy sell of “weight loss” and “fast results” drives people and dollars toward unhealthy biomechanical practices. Students flock to classes and trainings because of these lures, and studios, gyms, and clubs repeat exercises and drills that fail to address foundational imbalances, weaknesses, or postural faults. Students walk in with dysfunctional posture and aches and pains, then work out in a way that reinforces their poorly coordinated blind spots, unknowingly perpetuating their imbalances. Their workouts set them up for further weakness and injury until one day their bodies give out. This is not a dig at any specific format or method. This is a call to action for more anatomy in all movement education programming. This is a call to instruct students so that they learn to embody their bodies and are not taught to “push through it.” Rather than teaching “moves,” I believe we should be focusing on teaching how to move. Rather than teaching poses or choreography, let’s help our students to develop an understanding of human movement.
Anatomy is not a concept that lives in your head; it is the matter that minds your body.
Anatomy is not a concept that lives in your head; it is the matter that minds your body. I have taught at many conferences and conventions with rooms full of movement educators. When I ask students where a certain muscle is, the majority can point to it on a chart, but few can locate it within their own bodies. This is an embodiment disconnect. In a culture where musculoskeletal diseases are on the rise, it is not okay for movement educators to overlook the inner workings of human anatomy. It is time for us, as the ambassadors of well-being, to take control of our own self-care and body habitats to be better examples of fitness and health for our students. To not know your way around your own body is to lack self-knowledge. We have lost our way inside our own skin. We are dissociated and disembodied from our own structures. Our collective reliance on others to take care of our own basic needs cripples us, perpetuates our dependency on drugs and doctors, and is simply disempowering.
But this body ignorance goes far beyond the fitness community. It is my dream that everybody could have a basic education and understanding of how to hold themselves to maximize health and minimize damage. Along with that, a basic toolkit that helps you self-locate and then fix the “issues in your tissues.” Posture, breath, movement, and lifestyle matter to your overall health. It is through our own embodied exploration and education that we can create social change through self-care healthcare. We as a society need to stop reacting to issues and move toward proactively treating ourselves.
What Is the Roll Model® Method?
The Roll Model is a simple self-treatment method that teaches you to use a variety of grippy, pliable rubber balls to eradicate your aches and pains and reform your body from the inside out. The Roll Model Method helps you identify your body blind spots: those areas of your body that are catalysts for pain and injury. These areas are overused, underused, misused, abused, or totally confused and need to be felt, seen, and heard by you. What you don’t see inside your body can and will hurt you unless you skillfully integrate your blind spots into your global movement patterns.
It’s in Your Hands
You have enormous potential for healing yourself and fixing the issues that plague your tissues. I believe that it comes down to simple body behaviors that are often overlooked as causes of aches, pains, dysfunction, exhaustion, and emotional unrest. How you stand, sit, walk, and breathe has a ripple effect throughout your entire being. Every move you make should be an attempt to normalize the tissues of your body so that they are strong and balanced enough to hold you in good posture within optimized positions.
Now it’s time for you to get the ball rolling! Let's put everything we've discussed into practice. The following practice is specifically helpful for the hips.
For the sequence below, you'll need two Yoga Tune Up balls. (If you don't have the Yoga Tune Up ball, you can use tennis balls.)
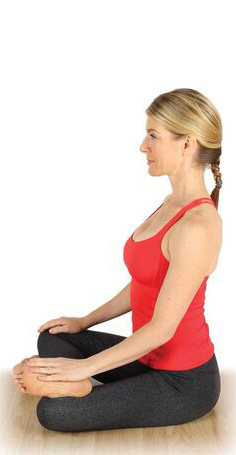
Check-In: Double Pigeon

Roll Sequence
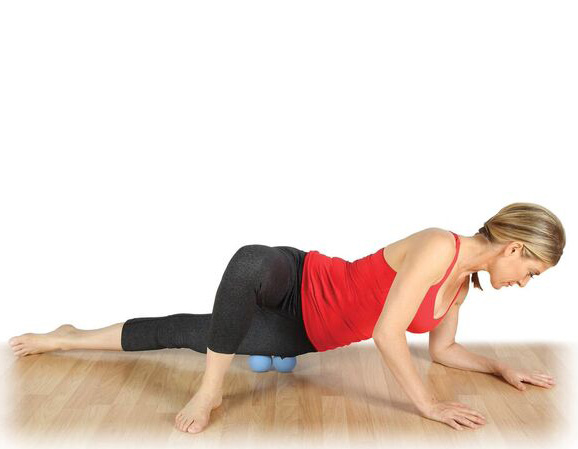
Piriformis Play

 Contract/relax by tightening your buttocks for a few seconds and then releasing, five to eight times.
  Note: If the pressure is too much, take your balls to the wall, standing and leaning against it.
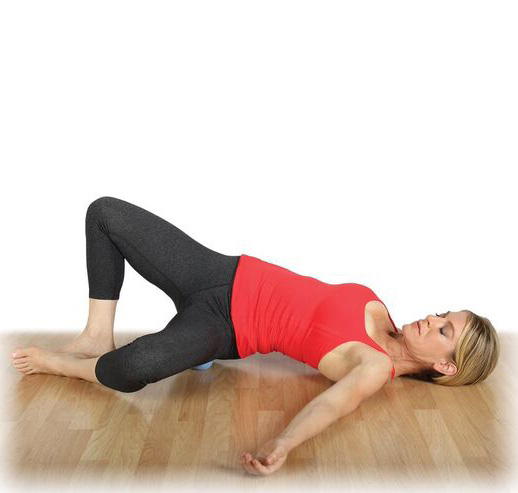
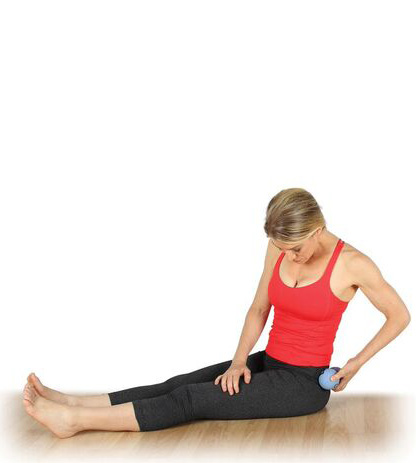
Action 3: Use a ball to locate your left greater trochanter (the bony protrusion on the side of your upper thigh). Maneuver your pelvis and hips so that the ball draws a circle around that bony landmark and travels across its tendons and the other soft tissues that connect here. Circle in one direction, then reverse.


 Switch sides and repeat actions 1–3.
 Mom Jean Pocket
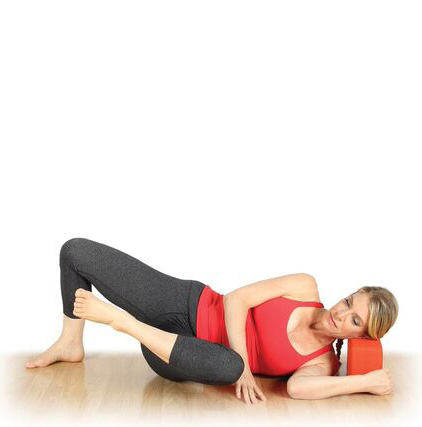
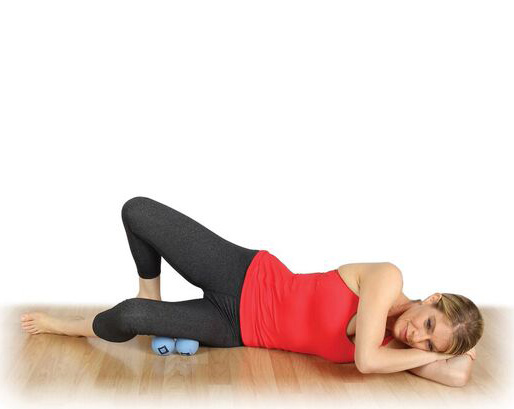
Action 1: Place two balls side by side at the upper margin of your gluteus medius. Lie on your left side, rest your head on a block or pillow, and let the balls sink in for several breaths.

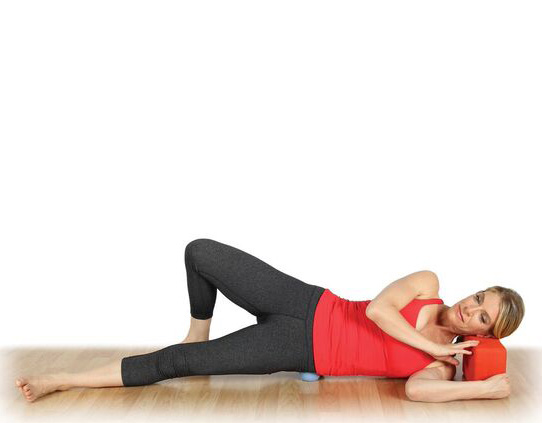
Initiate contract/relax by pressing the outside of your left foot into the ground to activate the gluteus medius muscle in the side of your buttocks. Then release that tension. Repeat two times.
Then you can attempt to strip your gluteus medius by pointing and flexing your foot to drive a bit of up-and-down motion into the balls (not pictured). Action 2: Initiate a crossfiber action by tucking and untucking your pelvis (anterior and posterior tilt). Intensify this action by spinning one or both balls deeper into your upper buttocks before initiating the tucks (not pictured). 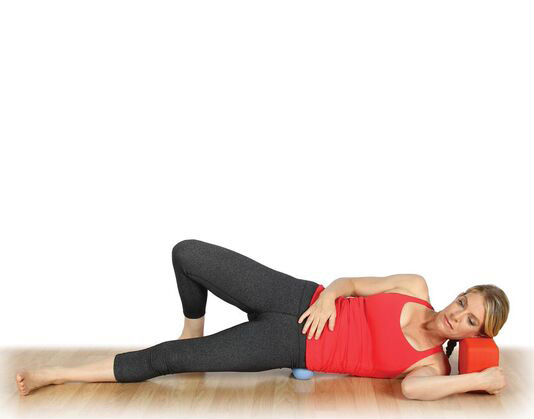
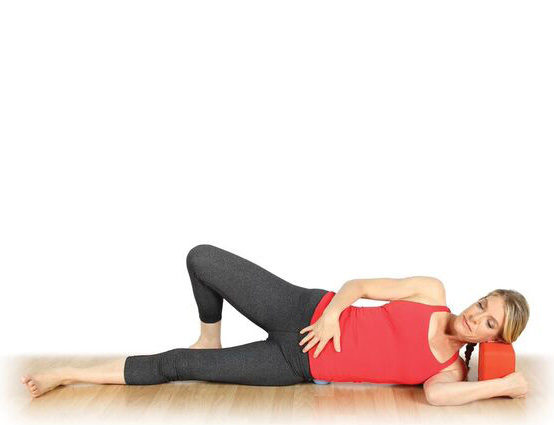
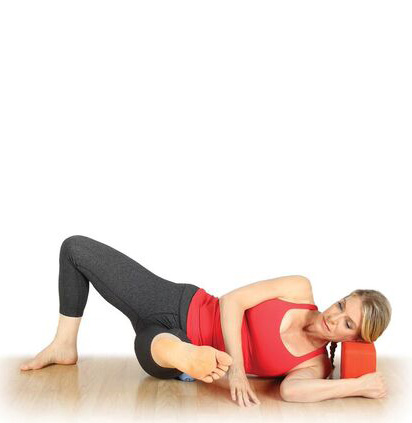
Action 3: Pin and stretch and create a taffy-pull action of these tissues by lifting and lowering your left thigh toward the ceiling and back to the floor several times. 
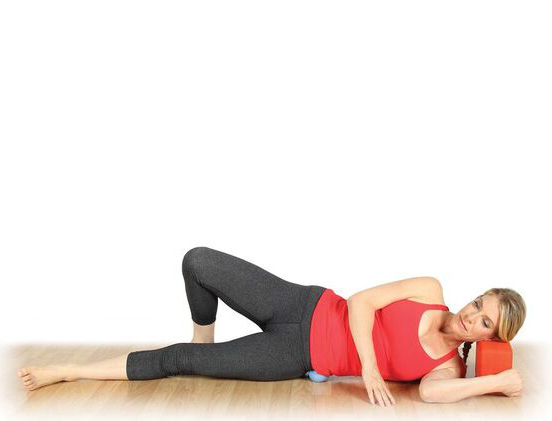
Follow that with a bicycle pedal action, hovering your left leg a few inches above the floor. Cycle a few times in one direction, then switch directions. 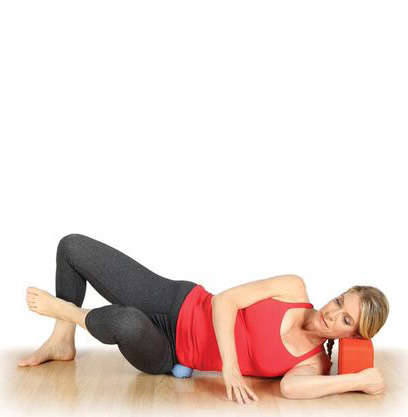
 Switch sides and repeat actions 1–3.
Tensor Fascia Fillet
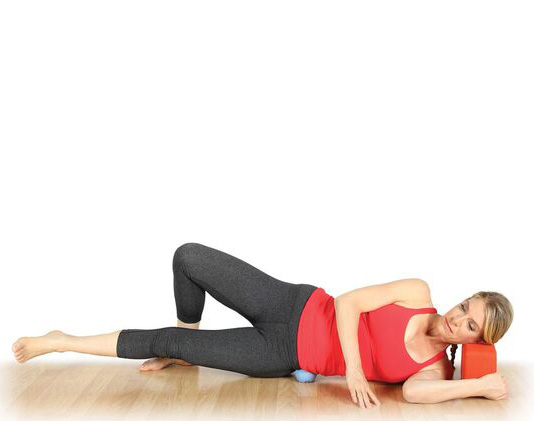
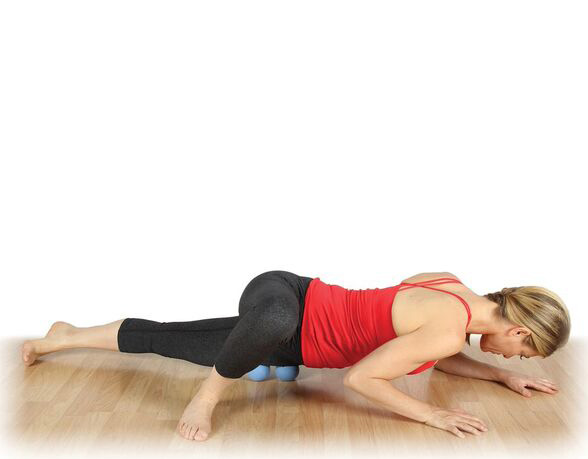
Action 1: Place two balls vertically along your left tensor fascia latae (TFL), which is located where your front trouser pocket rests on your outer thigh. Find it just below and to the side of your ASIS (anterior superior iliac spine).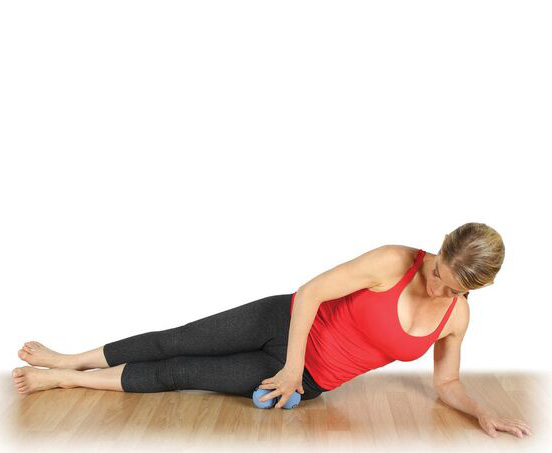
Cross your right foot in front of your left thigh to pin the balls in position. Take several deep breaths and let the balls impress themselves into your tissues. 
Initiate stripping by pointing and flexing your left foot into the floor to propel the balls up and down your TFL. This is a very small motion. Action 2: Pivot your body and thigh over the balls to create crossfiber friction across this small myofascial tissue. Repeat five to eight times. 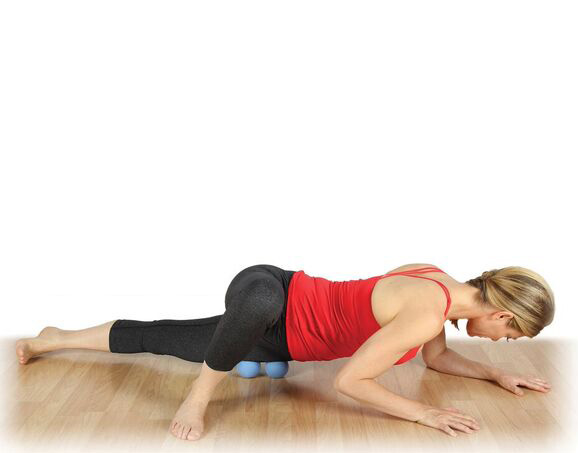

 Action 3: Pin and stretch your TFL by flexing and extending your bottom knee (not pictured).
 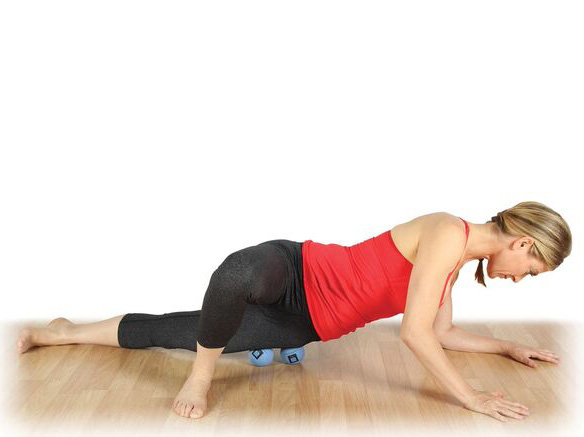 Action 4: Track the ball(s) down to the center of the side of your left thigh on your IT band. Keep your knees bent, and, if you can tolerate the pressure, stack your right thigh on top of your left. (If not, keep your right leg scissored behind the left.)
 Slide your left thigh forward and backward to encourage the balls to cross the IT band and vastus lateralis.
 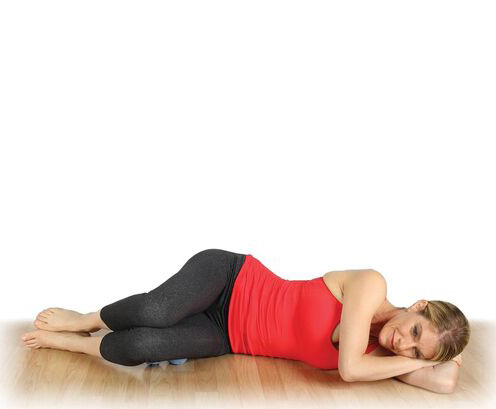 Switch sides and repeat actions 1–4. Recheck: Double Pigeon Reset your stretch position and notice if you have more range of motion available in your hips, and if it is easier to keep your spine neutral. Reflect: 1. Was there more or less tension on one side of your buttocks? 2. Take a walk and notice if you feel your buttocks firing as you step. 3. Finish this statement: I feel ____. Key Terms: Abdominal-Thoracic Breaths: Breathing from the bottom of the torso to the top of the torso. Strip: Sliding the balls from one end of the muscle to the other. Crossfiber: To manipulate a ball perpendicularly or obliquely to the line of pull of a myofascial structure. Pin & Stretch: Finding a location along a muscle that feels tender, tight, or knotty and lodging a ball into it. To stretch, use your body pressure to sandwich the ball between you and the floor, then move your appendage close to the pinned area in any possible direction.
About the Teacher
Jill Miller
Jill Miller, C-IAYT, ERYT, is the co-founder of Tune Up Fitness Worldwide and creator of the self-care... Read more
Trending Member Content
- Learn basic polyvagal theory
- Self-regulation practices
- Understand the vagus nerve