
A Yoga Sequence for Osteoporosis
Osteoporosis, a condition in which the bones become weak, porous, and prone to fracture, is the most common bone disease. It is preceded by osteopenia, in which bones have lost mineral density to a less severe degree.
Since it’s estimated that more than 50 percent of Americans over age 50 have one of these conditions, it’s likely that at some point you or your yoga students may benefit from a yoga sequence that is tailored to the specific risks and needs associated with loss of bone density.
“Gentle, weight-bearing exercises such as yoga can help prevent or cease the progression of osteoporosis,” says Bill Reif, a physical therapist based in Atlanta with 40 years’ experience and author of The Back Pain Secret: The Real Cause of Women’s Back Pain and How to Treat It.
However, yoga practice must be modified, to varying degrees, for those with bone-density loss, depending on the extent of the loss. According to Reif, “The more severe the loss is, the less extreme the movements—especially spinal movements—need to be.”
Often students with small losses in bone density—mild osteopenia—can safely practice the majority of yoga poses. Students whose bone loss is more advanced—whose spines have already rounded into a “C” shape or who have already suffered fractures—will need to be more cautious. “But the only way to know what range of motion and activities your bones can handle is to consult with your doctor,” Reif counsels.
In general, per Reif, the poses that are most beneficial for students with osteoporosis are those that “strengthen the muscles that support a neutral spine and improve posture, encourage weight-bearing in all the limbs, and promote balance.” The safest practice, in his view, is one that avoids “extreme ranges of spinal motion, especially trunk flexion” (rounding the back).
Reif recommends making the practice more challenging by adding weight rather than attempting more acrobatic postures. (We give a more detailed list of do’s and don’ts in this article.)
The practice below takes these recommendations into account. (Since many students with osteoporosis also have exaggerated thoracic kyphosis, an additional sequence to consider is this one.)
Yoga Sequence for Osteoporosis
To set up, place a chair near the front of your mat, its seat facing you (or use a support of equivalent height—about knee height—like a stack of blocks or a coffee table).
If you would like to increase the intensity of a few of these poses, have two-pound dumbbells and ankle weights handy. Reif recommends increasing the weights gradually as you become stronger.
A note about the weights: Although using weights is valuable for building bone density, rounding the spine—as we often do when picking up or putting down weights—is the most dangerous movement for those with osteoporosis. If you use weights in the following sequence, make a point of not rounding your back when you lift and lower them. That might mean bending your knees and kneeling to pick them up or keeping the weights on the seat of the chair rather than the floor.
In all of the poses in the sequence, and in any yoga practice for osteoporosis, focus on lengthening the spine by reaching the crown of the head and tip of the tailbone away from each other to increase the space between vertebrae. Make your transitions slow and mindful to decrease the risk of falling and to build strength.
1. Hero’s Pose (on a block) In hero’s pose, we can create a neutral spine and work to elongate it. When your spine is in neutral, the back of your head and the bottom of your sacrum will be “stacked” and your neck and lower back will curve in slightly. It’s often easier for many of us to find our lumbar curve in this pose than it is sitting cross-legged.
To begin, come to a kneeling position with your shins and feet a little more than hip-distance apart and sit back on a block placed horizontally between your heels. Point your knees forward (instead of letting them splay open to the sides) and reach back through the tips of all your toes. (If this position provokes a feeling of strain in your knees, try sitting on two or even three blocks.)

Tip the pelvis anteriorly (forward) to allow your lower back to gently curve in. With your hands atop your thighs, lift your shoulders up, then move your shoulder blades toward each other on your back, trying to make a crease between them. Draw your head back to bring your ears over your shoulders. Root down with your sitting bones and reach up through the crown of your head, working to lengthen your entire spine, especially the back of your neck.
Hold here for several deep breaths, perhaps setting the intention to lengthen your spine in every pose and throughout every transition of your practice today.
2. Camel Pose (with hands on lower back) This high version of camel pose is a mild backbend that gently encourages an inward curve of the thoracic spine, important for those with osteoporosis whose upper backs are beginning to round.
From hero’s pose, lift into a high kneeling position. Leave the block between your heels. Place your hands on your lower back with fingers pointing up or down, whichever is most comfortable for you. Move your shoulders up; then bring your shoulder blades toward each other on your back. Pressing down with your shins and hugging the block between your heels, lift your chest toward the ceiling, tucking your chin slightly as you move into a mild backbend.

Work to channel the backbend to that place right between the shoulder blades: Visualize your shoulder blades helping to boost your heart up.
Hold here for several breaths before returning to a vertical spine. Repeat once or twice more.
3. Tabletop Tabletop helps to build bone density in the hands and arms by asking them to bear weight.
Come to a hands-and-knees position, hands on the floor under your shoulders and hips over your knees. Root down with the four corners of each hand, especially the bases of your index fingers, and work to spin the eyes of the elbows toward that space between your index fingers and thumbs (externally rotating the upper arms slightly).
To create a neutral spine, anteriorly tilt the pelvis slightly, tipping the tailbone up toward the ceiling just enough that the lower back curves in gently. Deepen the crease between your shoulder blades, moving them toward each other as you drop your chest toward the floor, and lengthen your spine from end to end.
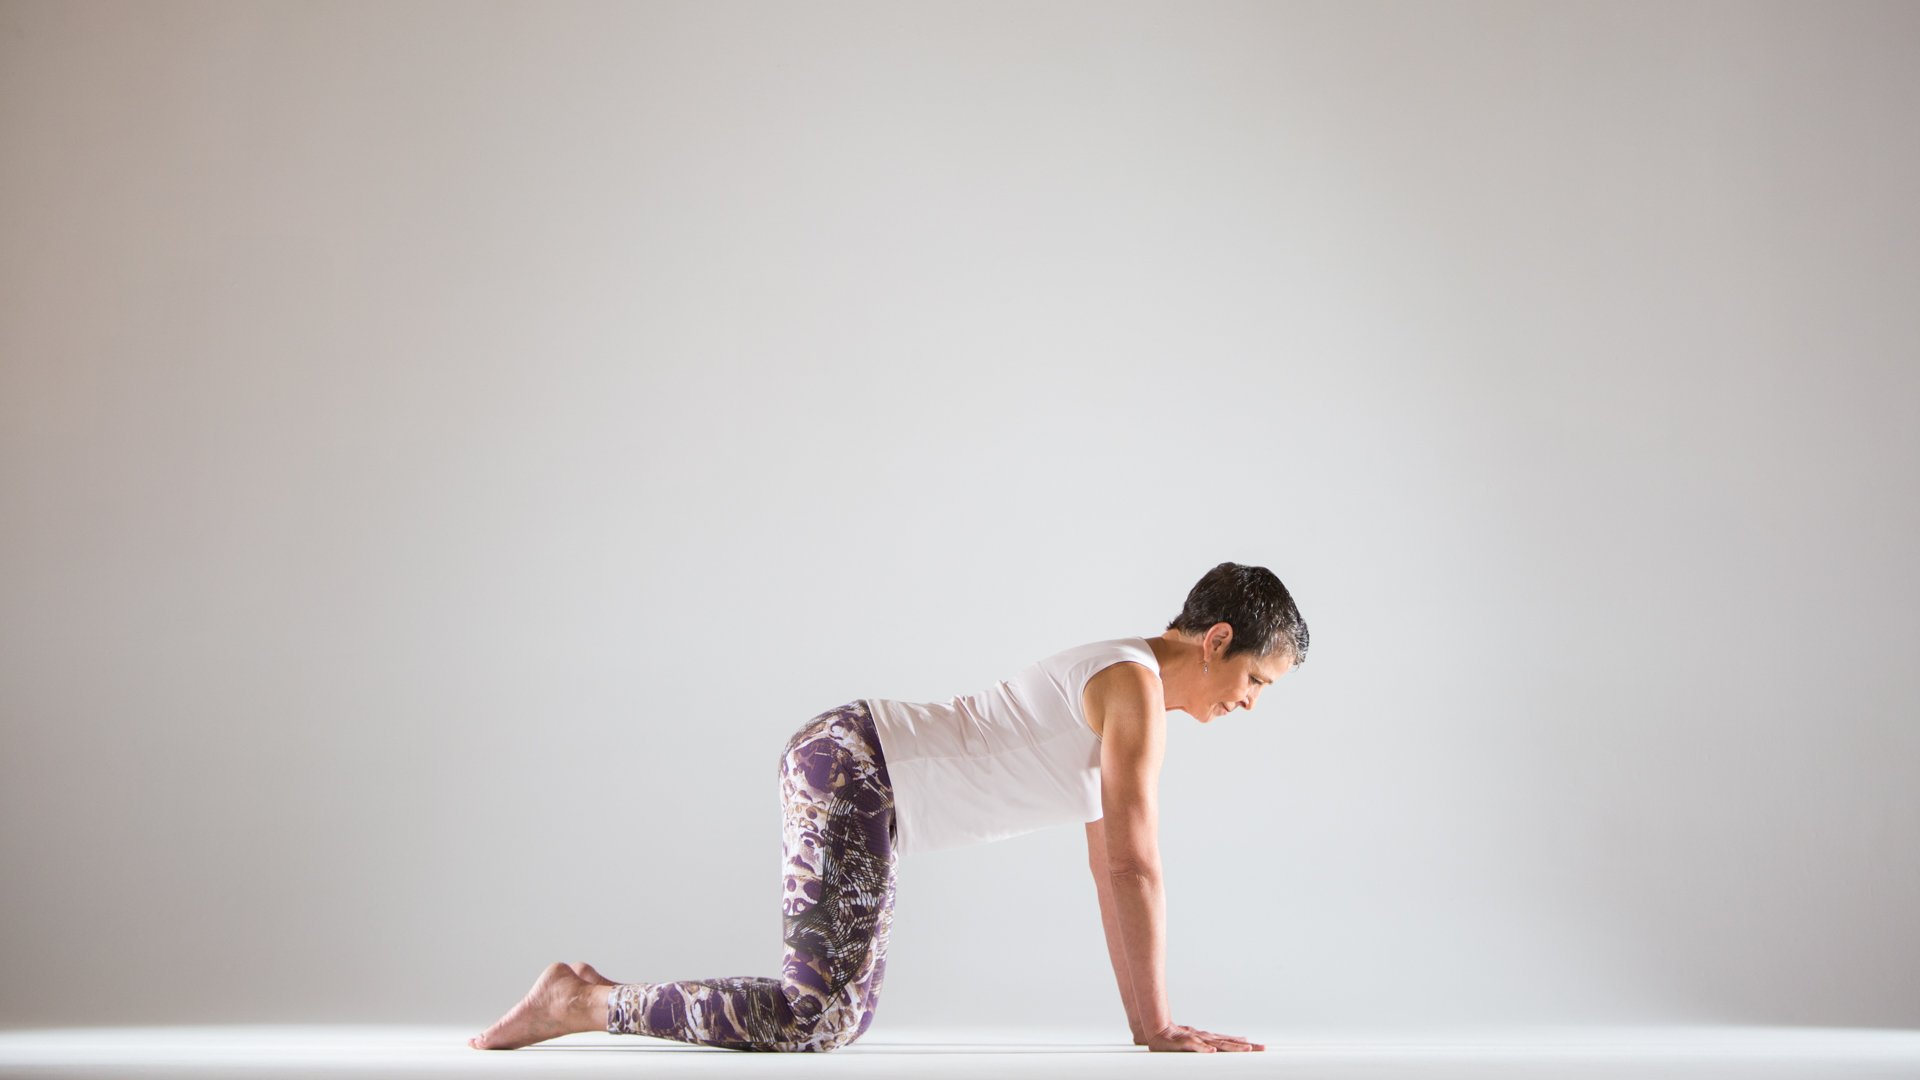
Hold here for several breaths, drawing the belly in softly toward the spine with every exhale.
If/when you would like more intensity, step one foot back, and then the other, into plank pose. Maintain your neutral spine, the rootedness of your hands, the external rotation of your upper arms, and your shoulder and spinal alignment. Hold for several breaths.

4. Bird Dog (with optional dumbbells and ankle weights) In bird dog you can create a neutral spine and lengthen it, while strengthening the arms, legs, and core.
If you would like to work with weights, place light dumbbells near the front of your mat, parallel to the long sides of your mat, and strap your ankle weights on.
Come to hands and knees, as described above and, slowly, without wobbling from side to side or sacrificing your neutral spine, either lift your left hand up and reach straight out in front of you (palm facing in, fingers reaching forward) or first grab one dumbbell with your left hand, palm facing in, and lift it straight out in front of you.
In either case, lift your arm as high as you comfortably can, perhaps bringing your left hand in line with your left shoulder. (Make sure your back doesn’t round. You may not be able to bring your arm parallel with the earth without straining the upper back, shoulders, and neck. That’s okay; it doesn’t need to lift that high.)
Firming your left hip in so you don’t sway to the left, step your right foot back, toes curled under at first, then lift your straight right leg up to about hip height.
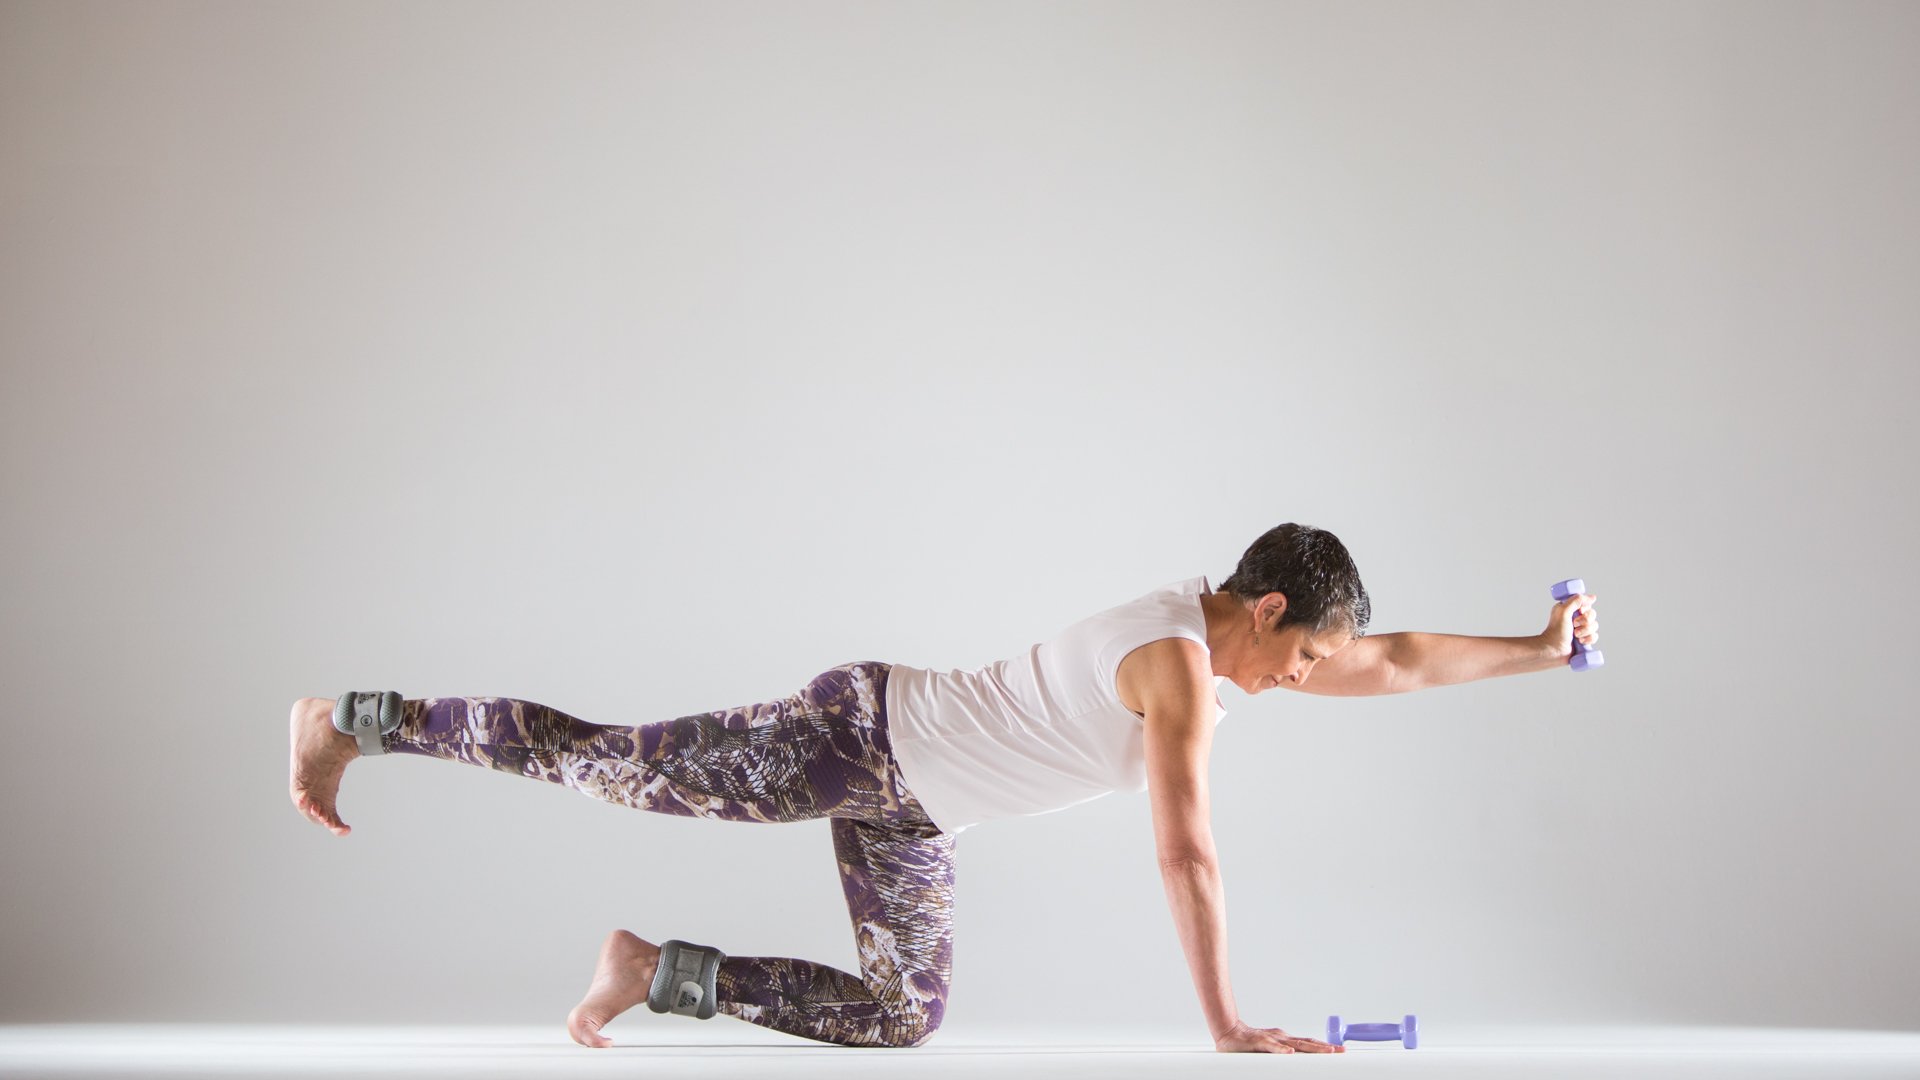
Work to lengthen from your left hand through your right heel, drawing the belly in lightly toward the spine with every exhalation.
It’s common to tip the chin forward and crease the back of the neck in this pose; instead, tuck the chin slightly and lengthen the back of the neck as you reach through the crown of your head. Continue to firm your left hip in.
Once you’ve made any necessary adjustments to your alignment, on your inhale, lower your left arm and right leg with control until they almost touch the ground, then lift again on your exhale, drawing your belly in to support your spine. After ten or so repetitions on this side, switch sides.
5. Half Forward Fold (hands on chair seat) While rounding the spine in a deep forward fold is risky for those with osteoporosis, in half forward fold we can establish a neutral spine and work to lengthen it as we transition to standing at the front of the mat.
Place a chair just in front of your mat. From hands and knees, shift your hips back and bring your hands to the seat of the chair. (If you are using dumbbells, place them on the chair seat now. You’ll use them for the next pose.)
Step your feet forward to the top of the mat so that they are hip-distance apart and parallel to the long sides of the mat. Point your slightly bent knees toward your middle toes. Lift your torso until there’s about a 90-degree bend at your hips and your wrists are under your shoulders.
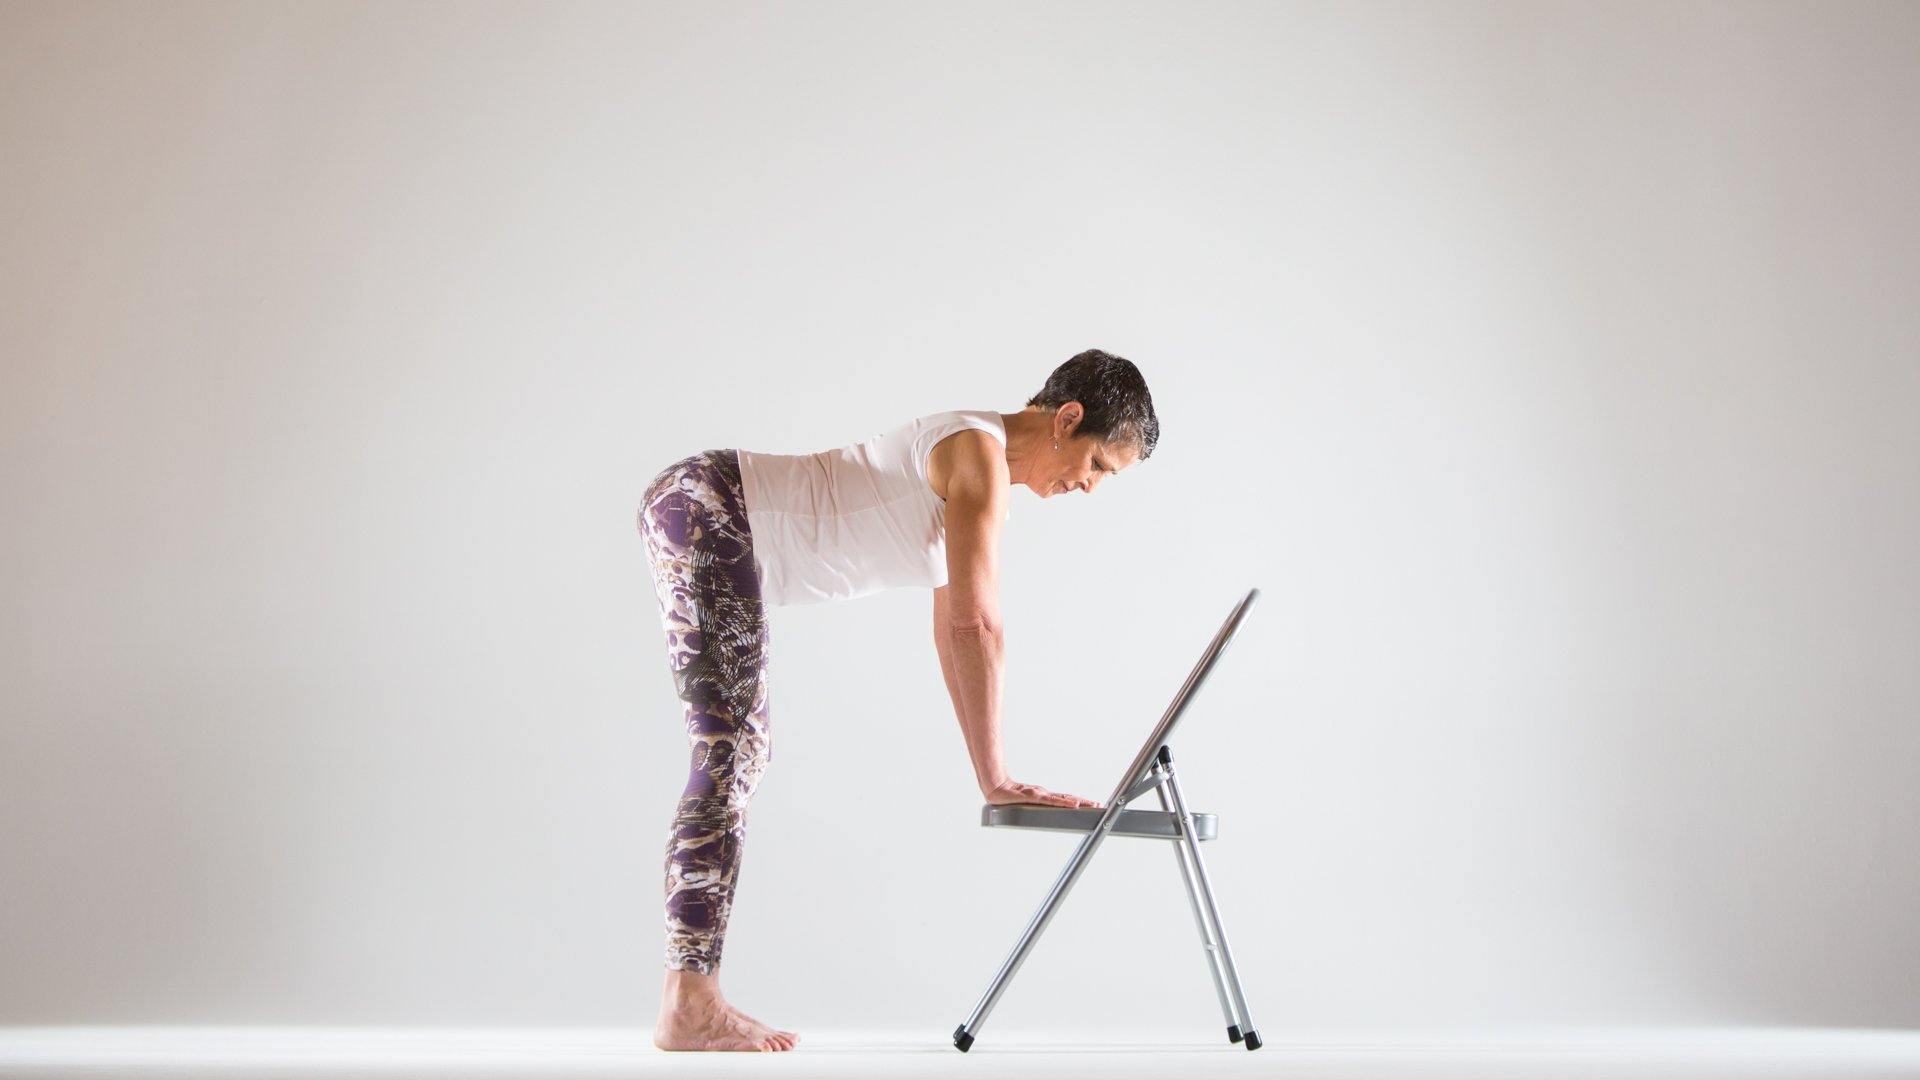
Work to find your neutral spine: Again, allow the lower back to curve in, drop the chest toward the floor, and draw the shoulder blades toward each other. Align your ears with your shoulders and reach through the crown of your head. Straighten your legs only as much as you can while maintaining this neutral spinal, and hold here for several breaths.
6. Mountain Pose to Chair Pose (with optional hand weights) Chair pose can help build arm and leg strength while maintaining a neutral spine.
From half forward fold, on an inhale lengthen your spine, and on an exhale lift your torso up to vertical, drawing your belly in as you lift. (Exhaling as we reverse-hinge to standing encourages the deep abdominal support and protects the lower back.)
Grab your dumbbells if you’d like to use them for the next movement.
With your arms alongside your body, palms facing in (and perhaps lightly grasping hand weights), lift your shoulders toward your ears, take them back, then bring the shoulder blades toward each other on your back (aiming to create a crease between them).
Inhale here, pressing down with your feet, and reach up through the crown of your head.

On an exhale, draw your belly in and lift your arms overhead (and your dumbbells, if you are using them) as high as you comfortably can as you tilt your upper body forward on a diagonal and bend your knees. Anteriorly tilt the pelvis enough that your lower back curves in.
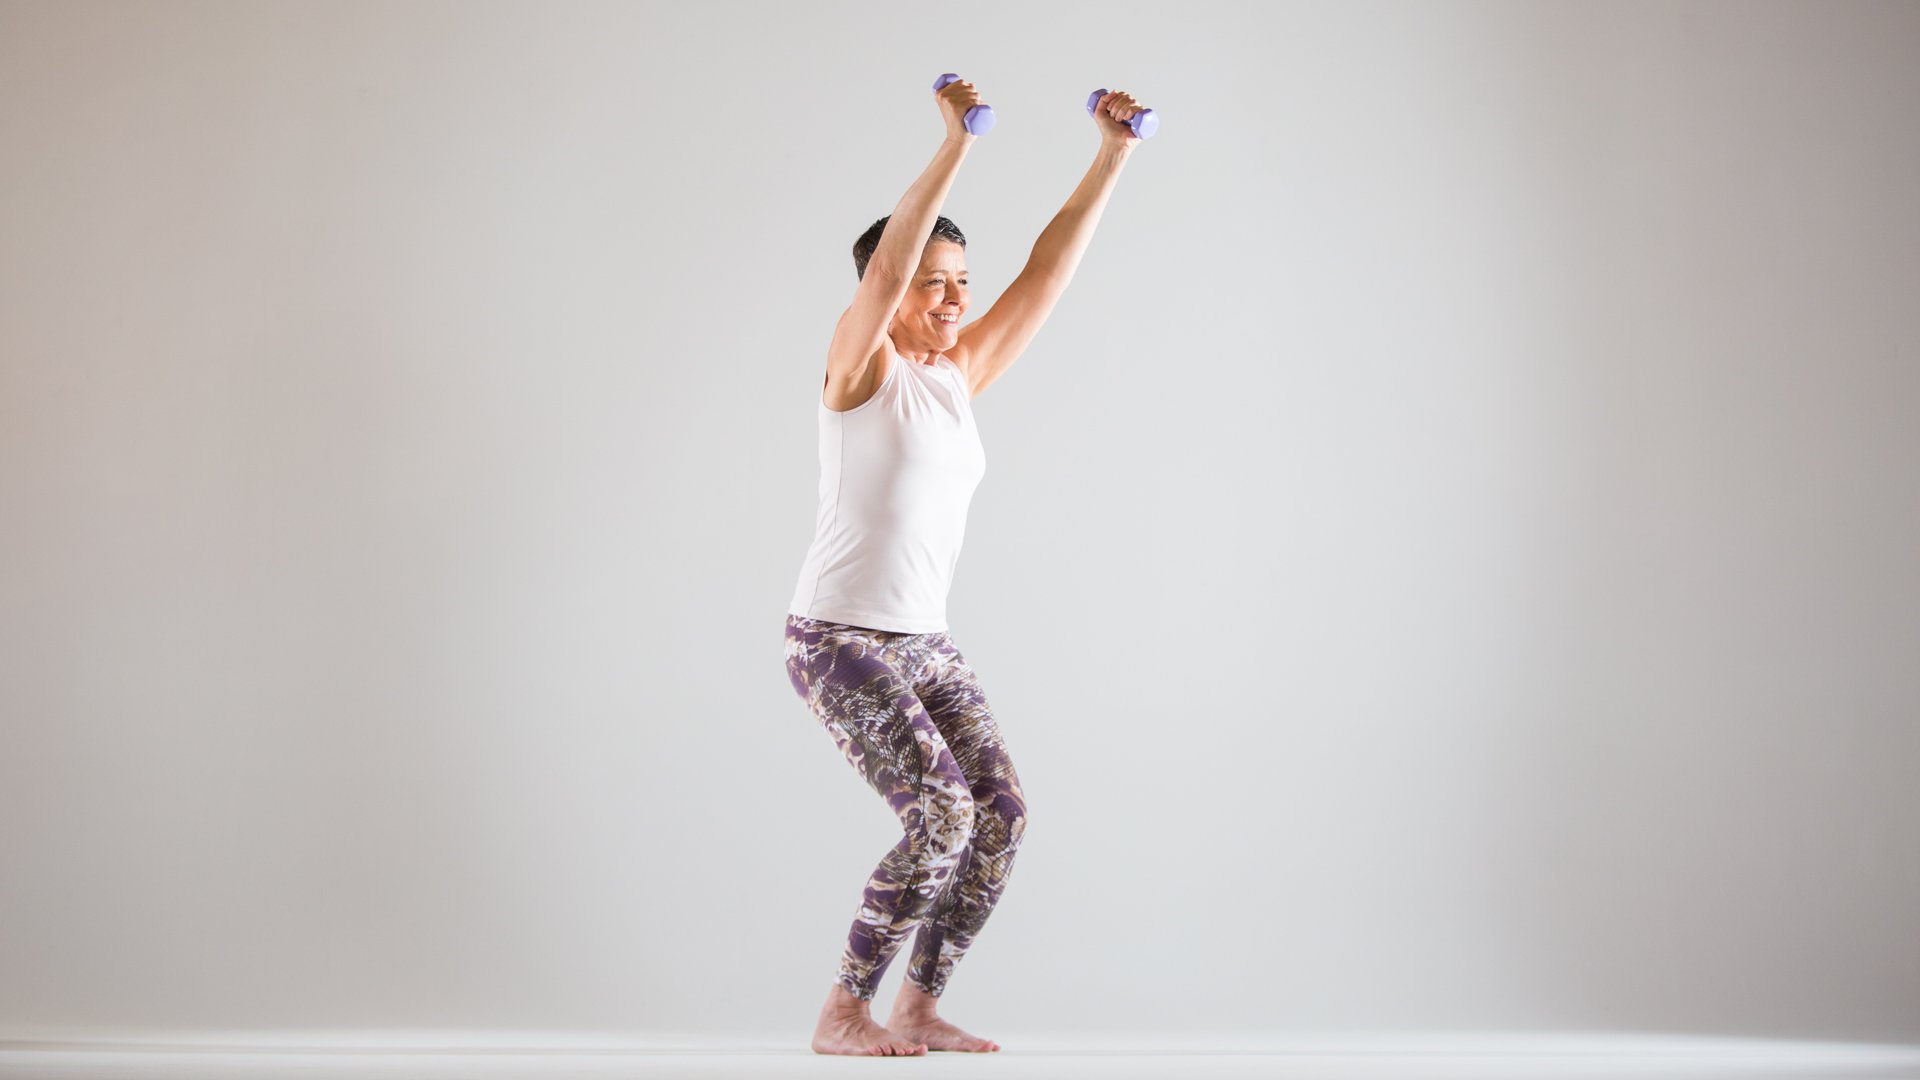
On an inhale, return to mountain pose, arms at your sides. On an exhale, come back into chair pose, slanting your upper body forward, lifting your arms overhead, and bending your knees. Repeat ten or so times.
7. Warrior I Variation (leaning forward and lifting optional dumbbells behind you) This version of warrior I helps to build shoulder, arm, and leg strength while maintaining a neutral spine.
Stand at the top of your mat, holding your weights alongside you, if you are using them. Press down with your right foot, and step your left foot behind you, left big toe pointing toward the front left corner of the mat and feet about hip-distance apart from right to left. (While this pose is often instructed with the feet in heel-to-heel alignment, one benefit of the wider stance recommended here is that it often increases stability, important for those with osteoporosis.)
Root down with the ball of your left foot and, if possible, that heel. (If your left heel doesn’t touch the mat, simply reach it toward the mat.) Bend your right knee, tracking it toward the second toe of your right foot and keeping it stacked above your right ankle. (If your knee goes past your ankle, lengthen your stance.)
Work to make your spine vertical and to bring the left side of your chest forward so your torso is parallel to the front of your mat. Align your shoulders by taking them up and back and then moving your shoulder blades toward each other to create a crease between them, as if you could hold a pencil there.
With your arms still at your sides, palms facing in (and perhaps lightly grasping your weights), tip your upper body forward on a diagonal. Do not bow your head or jut the chin forward; rather, keep the back of your neck long, reaching up through the crown of your head. Slowly lift your arms (and dumbbells, if you’re using them) just a few inches behind you, keeping your arms straight and maintaining the crease between your shoulder blades.
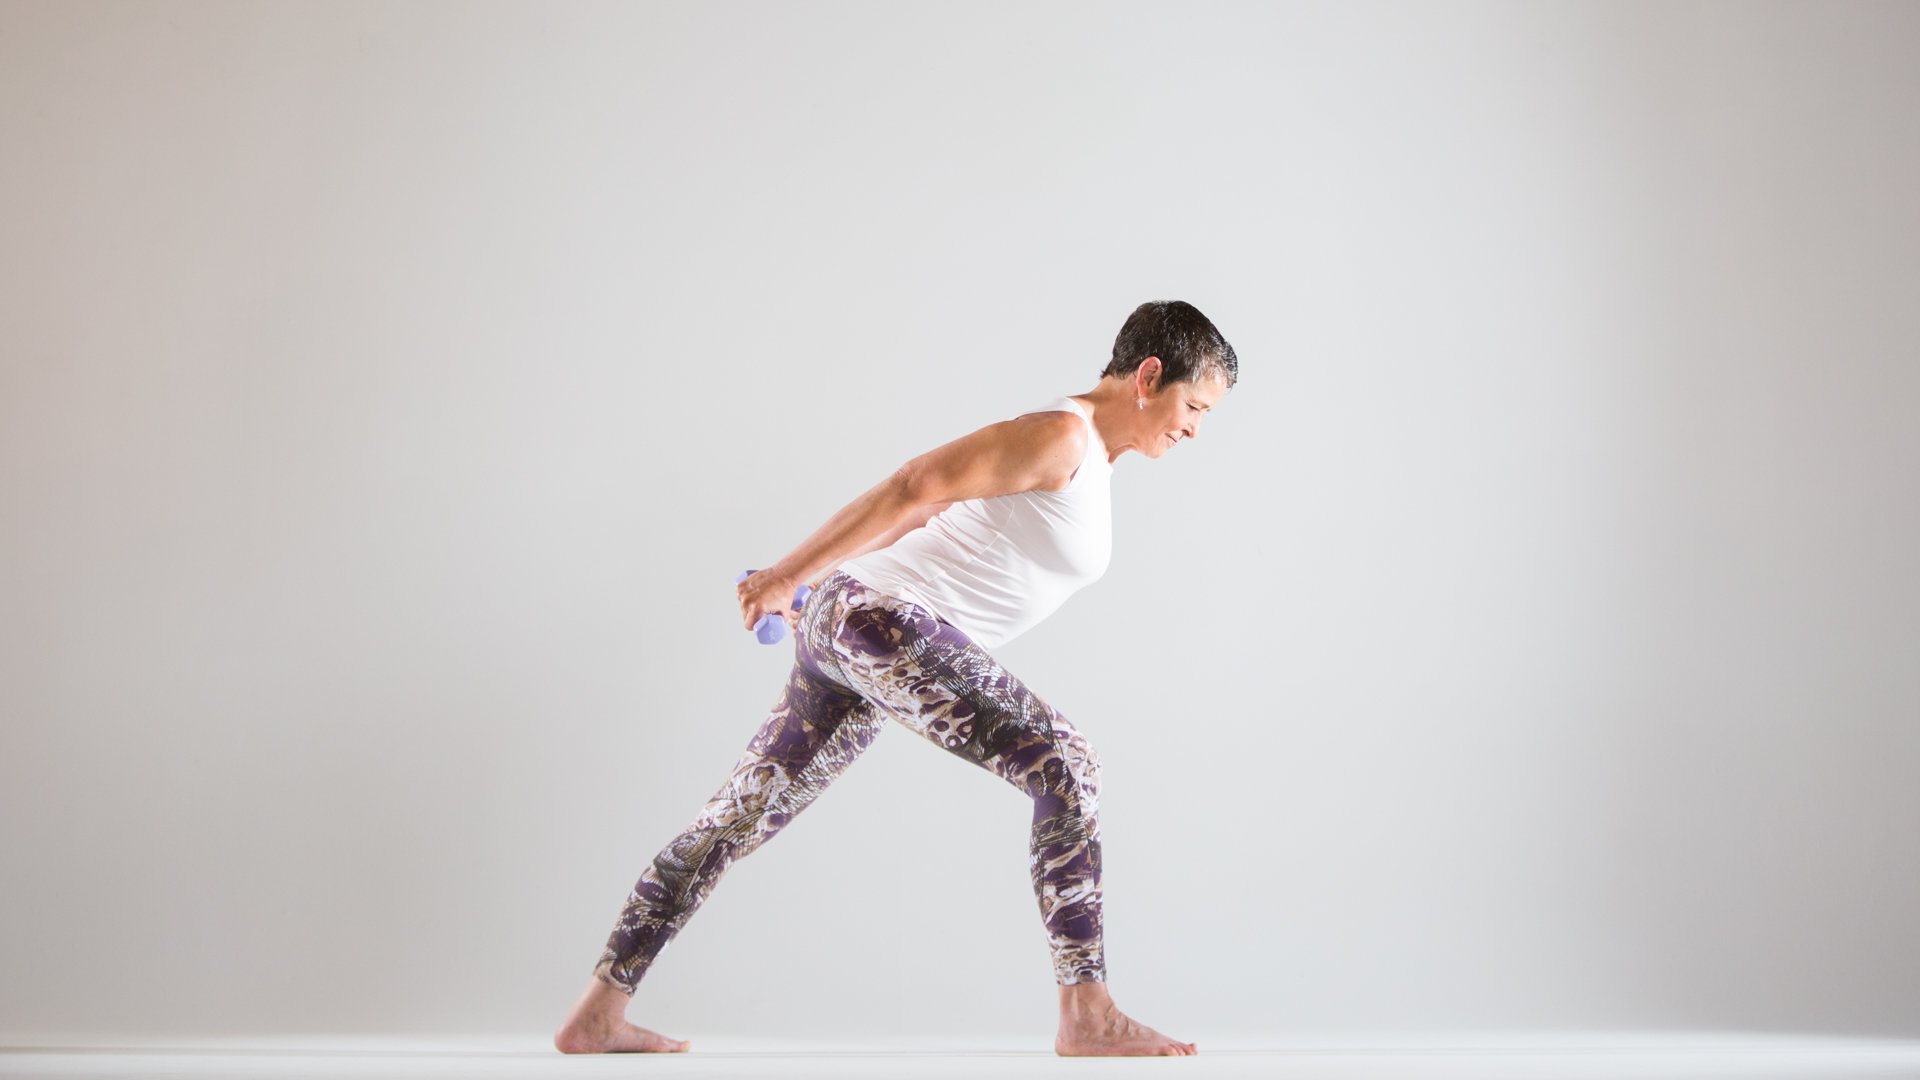
Then, on an inhale, keep your upper arms where they are, but bend your elbows to bring your hands (and perhaps your weights) toward your shoulders.
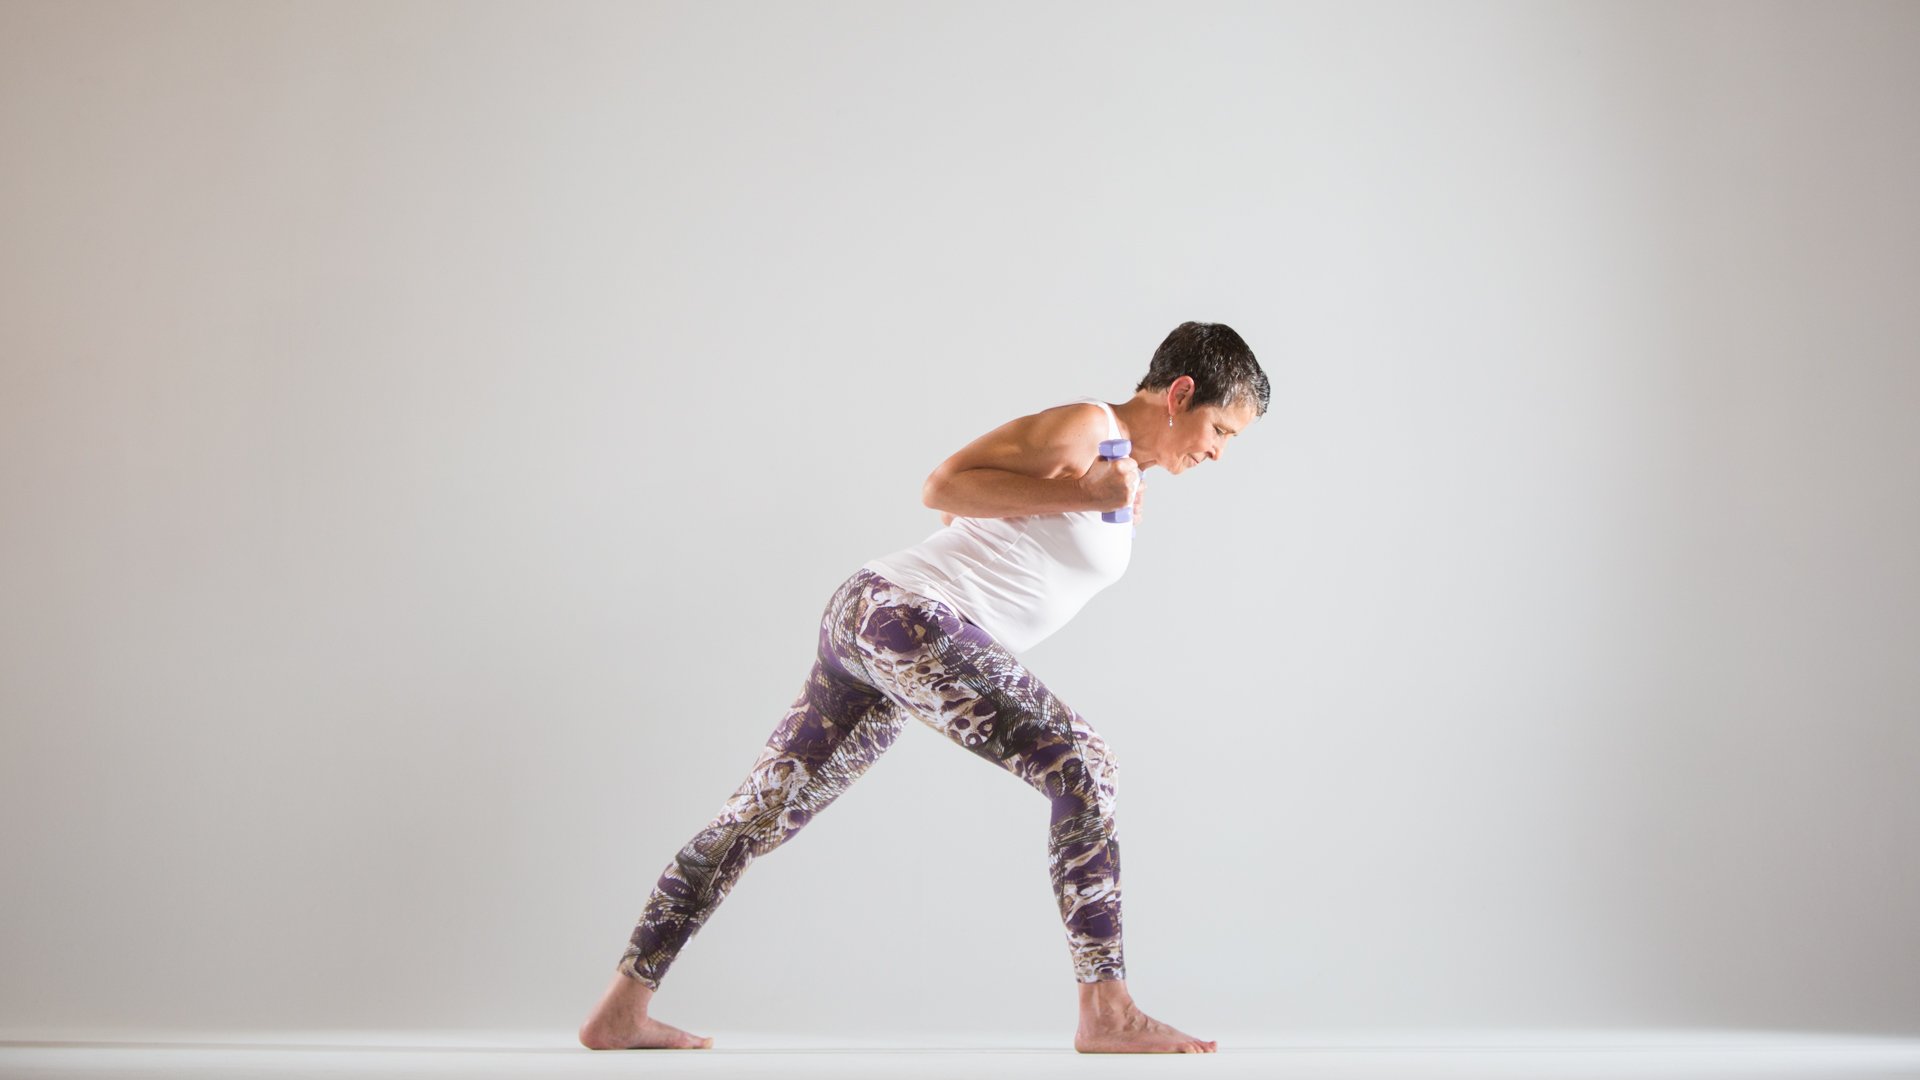
On an exhale, straighten your arms back alongside you. After 10 or 12 repetitions, return to upright, step your left foot forward, and switch sides.
8. Warrior II (with optional dumbbells) In warrior II, we can strengthen the arms and legs while improving hip flexibility.
From a standing position at the top of your mat, still holding dumbbells if you’re using them, root down with your left foot, and step your right foot a big step behind you, turning it in by a few degrees. Heel-toe your left foot toward the center of your mat, so that the heel of your left foot is in line with the arch of your right foot, and turn your torso to face the right side of your mat.
Keeping your right leg straight, bend your left knee, making sure it tracks toward the second toe of your left foot and stacks over your left ankle. (If your knee goes past your ankle, lengthen your stance.)
Lift your arms (and perhaps your weights) out to the sides until they’re level with your shoulders, palms facing up (or forward for those with less shoulder mobility).
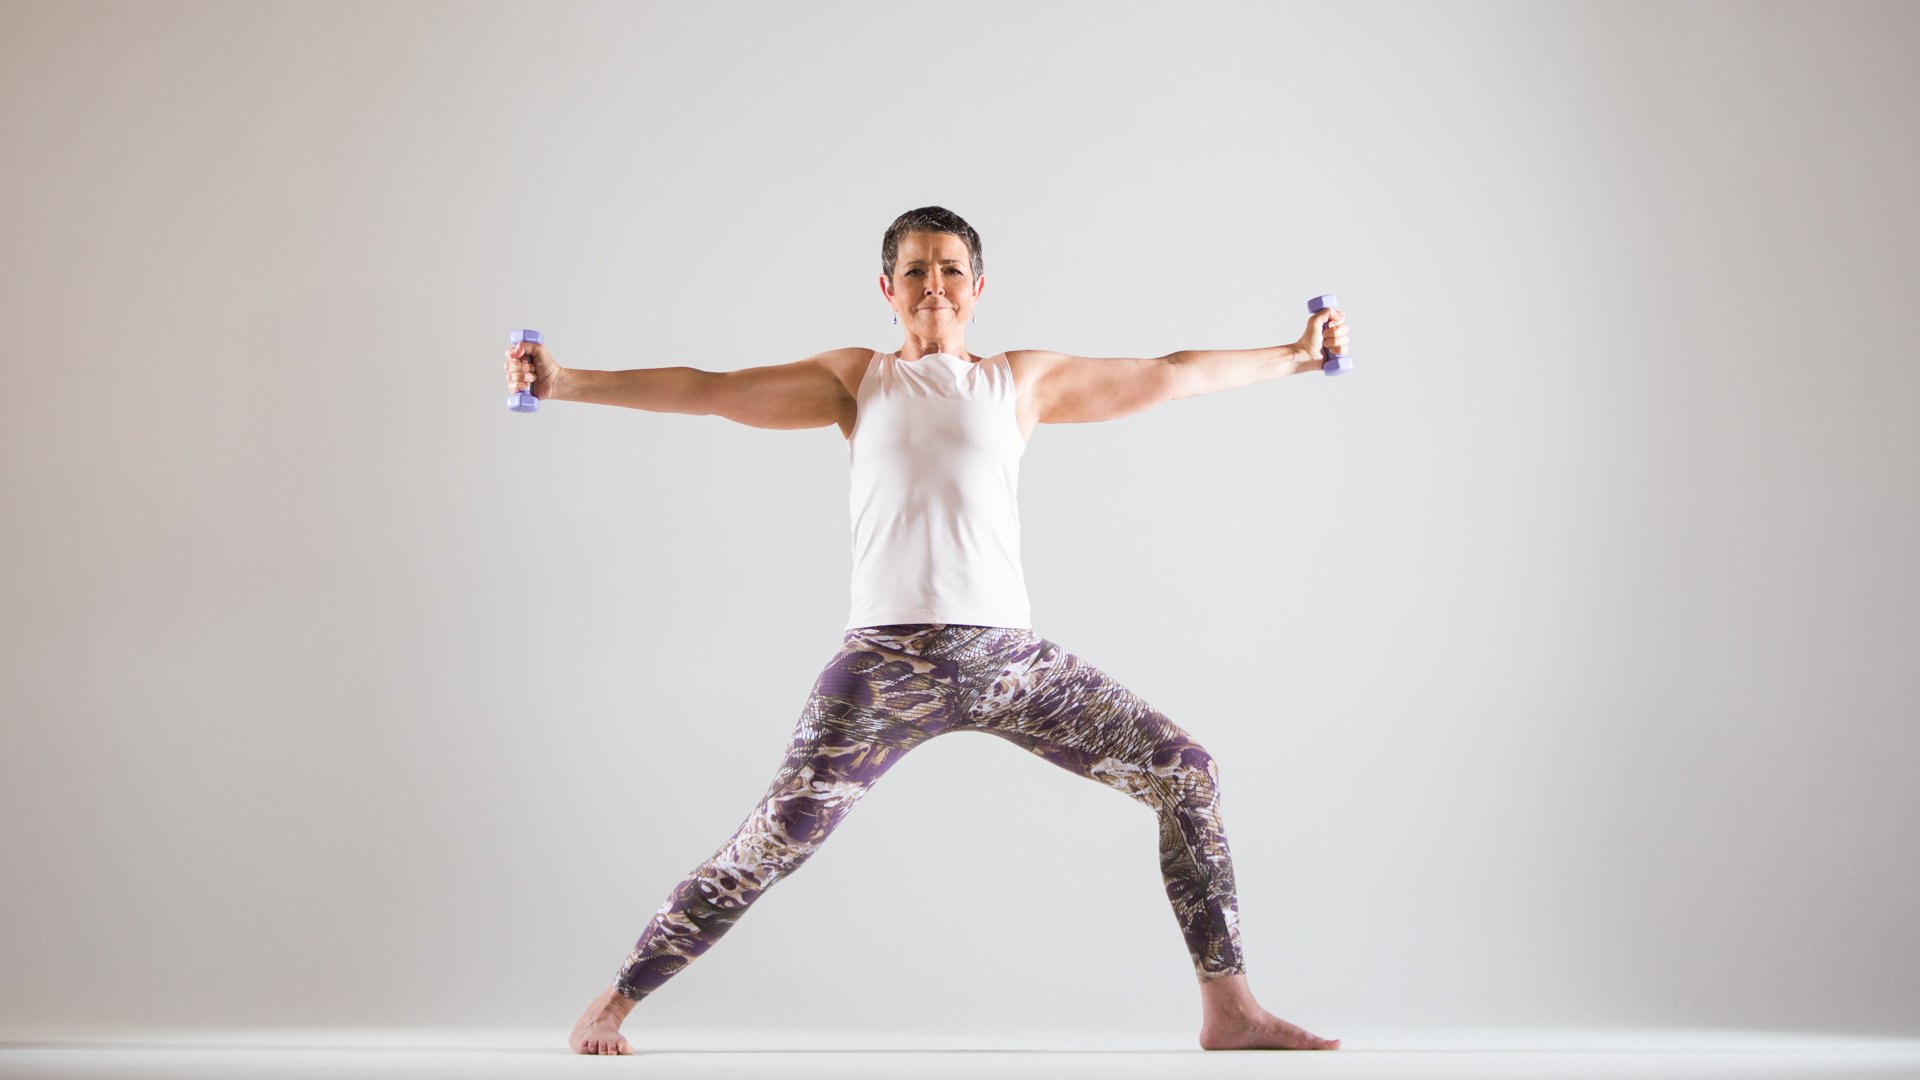
Keeping your arms straight, on an inhale, bring your hands together in front of you until they nearly touch, and on an exhale, open your arms out to the sides, lightly drawing your belly in toward the spine. After a few breath cycles, you might even try reaching your arms slightly behind you on your exhale.

After doing this ten or so times, lower your arms, return to a standing position at the front of your mat, and switch sides.
9. Tree Pose (with fingers touching the wall) Tree pose improves balance as well as hip flexibility.
Stand with the left side of your body about an arm’s length away from the wall and place your left fingertips on the wall and your right hand on your right hip. Root down with your left foot. Firm your left hip in. Lift your right heel, bending your right knee. Externally rotate your right thigh. Either rest your right heel against your left inner ankle or bring the sole of your right foot up to the inside of your left calf or thigh.

Press your left leg against your right foot and your right foot into your left leg. As you find your balance, decrease the pressure of your left hand on the wall. If you feel stable, you can bring your palms to touch in front of your chest or reach both arms up toward the ceiling in a “V” shape.

Hold here for several breaths, or until you begin to lose your balance. Bring your right foot to the floor and switch sides.
10. Staff Pose (leaning back) In this staff pose, we can work on finding and lengthening our neutral spines while bearing some weight with the hands.
Come to a seated position on your mat with both legs extended. Bring your palms (fingers facing forward or back) or fists to the mat a few inches behind your hips so you are leaning back slightly.
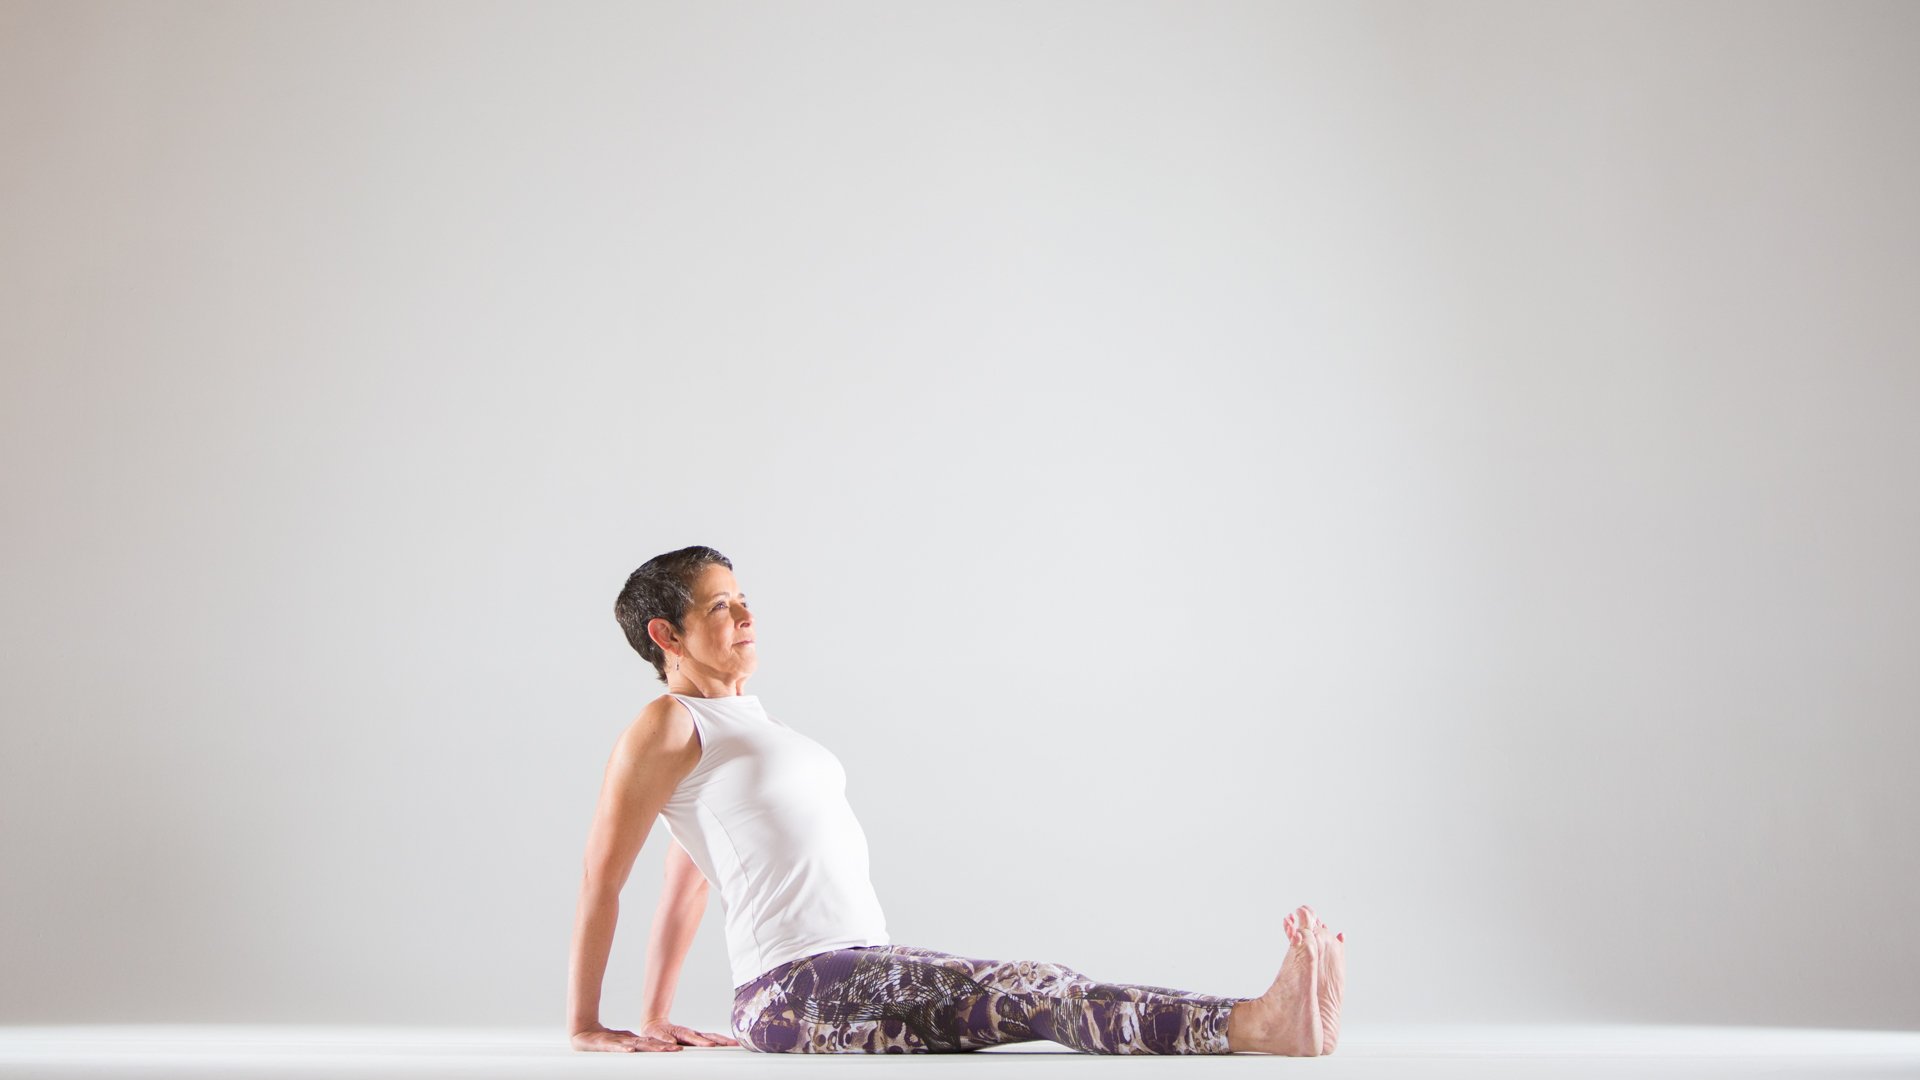
Work to find a neutral spine by curving your lower back in and bringing your ears over your shoulders while keeping the back of your neck long. Broaden across your collarbones and move your shoulder blades toward each other. Press down into your hands to lift your heart higher. Imagine that you are pressing your feet into a wall: Flex your feet and dig down with your heels.
Hold for several breaths.
11. Leg Lifts (with optional ankle weights) This exercise builds leg strength as well as the core strength that supports the lower back.
Lie on your back, wearing ankle weights if you choose. Reach through the crown of your head until the back of your neck is long. (If your neck doesn’t lengthen comfortably when you lie on your back, place a folded blanket under your head.) Straighten your legs, flex your feet, and dig down with your heels. Notice how your belly moves with the breath, drawing in with every exhale.
On an inhale, root down with your left heel. On an exhale, trying not to disturb the rest of your body, lift the right leg by just a few inches. Inhale as you lower. Switch sides. Lift and lower each leg ten times or so, always trying to maintain steadiness in the rest of your body.
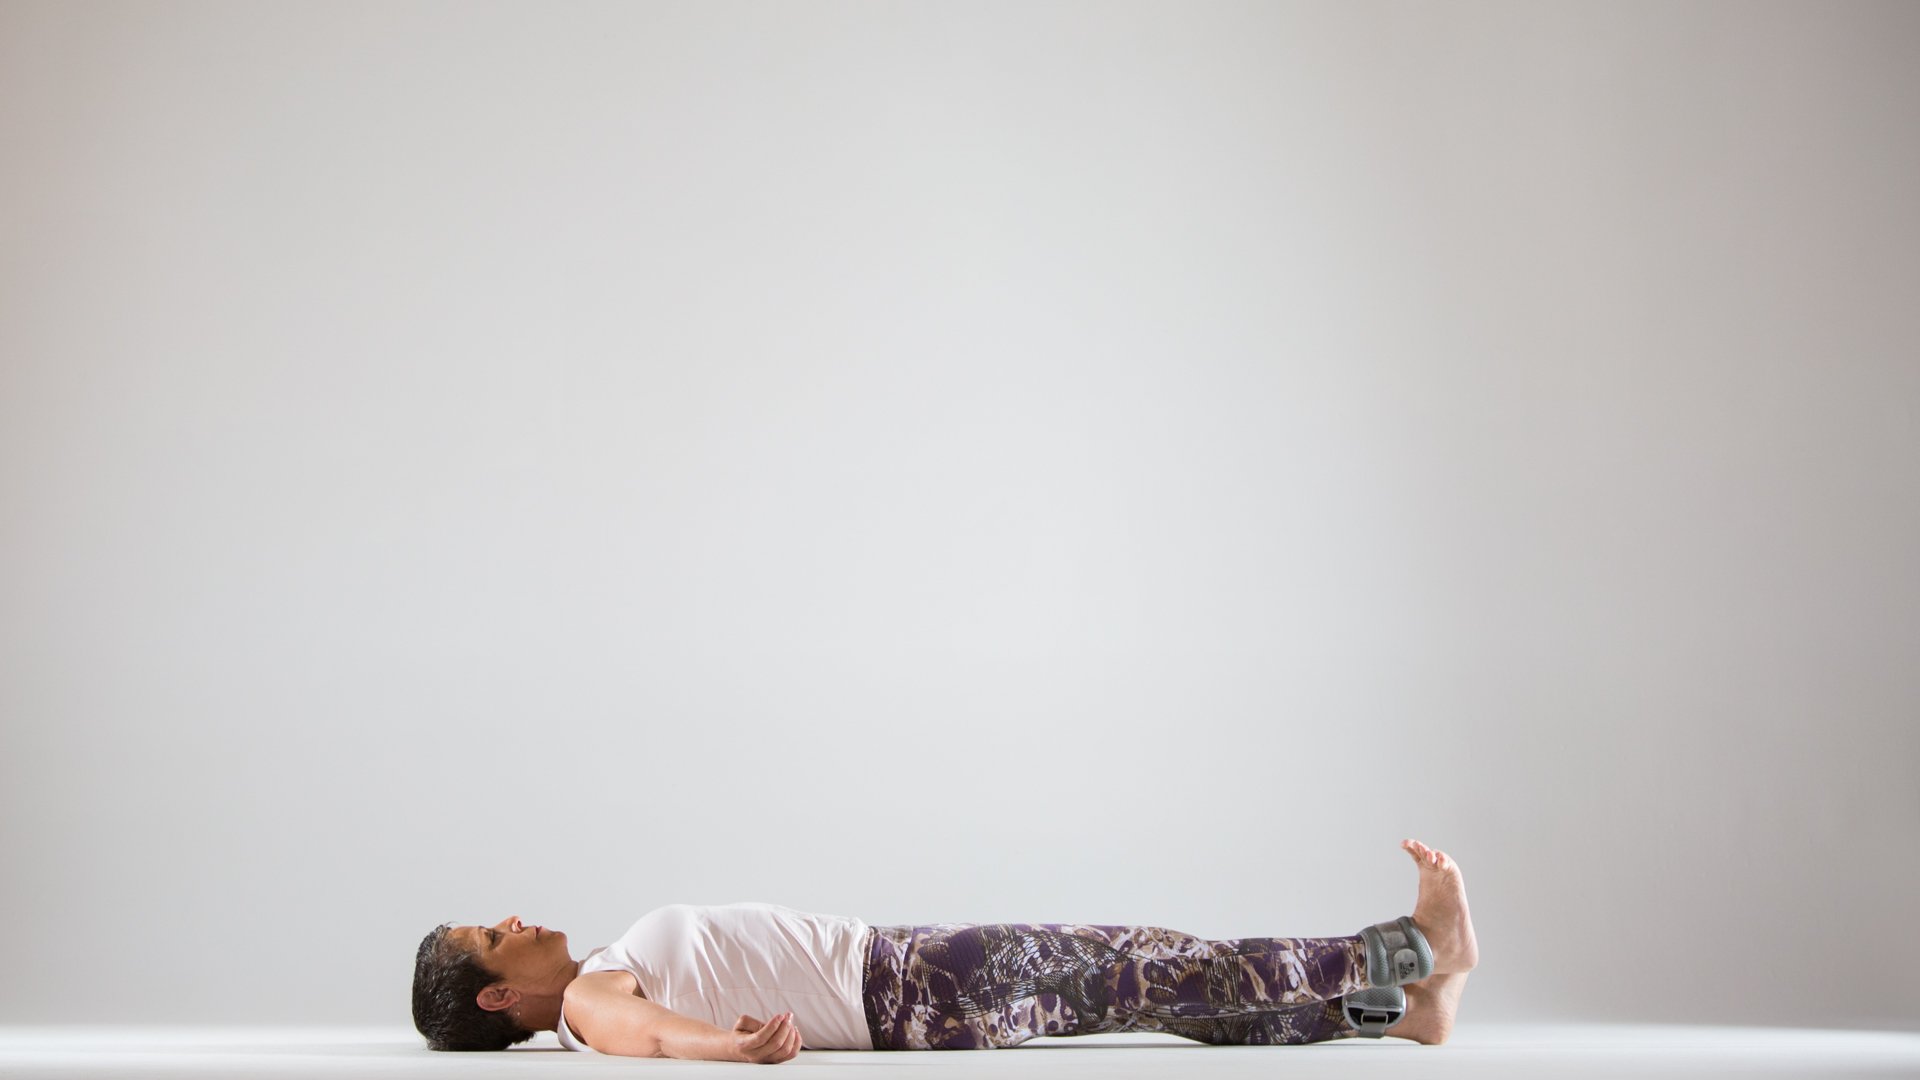
Note: If working with your legs straight is too intense for your lower back, bend your knees. Start with your feet on the floor as in bridge. On an inhale, root down with the right foot and the right hip, and on an exhale, lift the left foot off the floor, keeping the knee bent and bringing the left shin parallel to the earth. Switch sides.
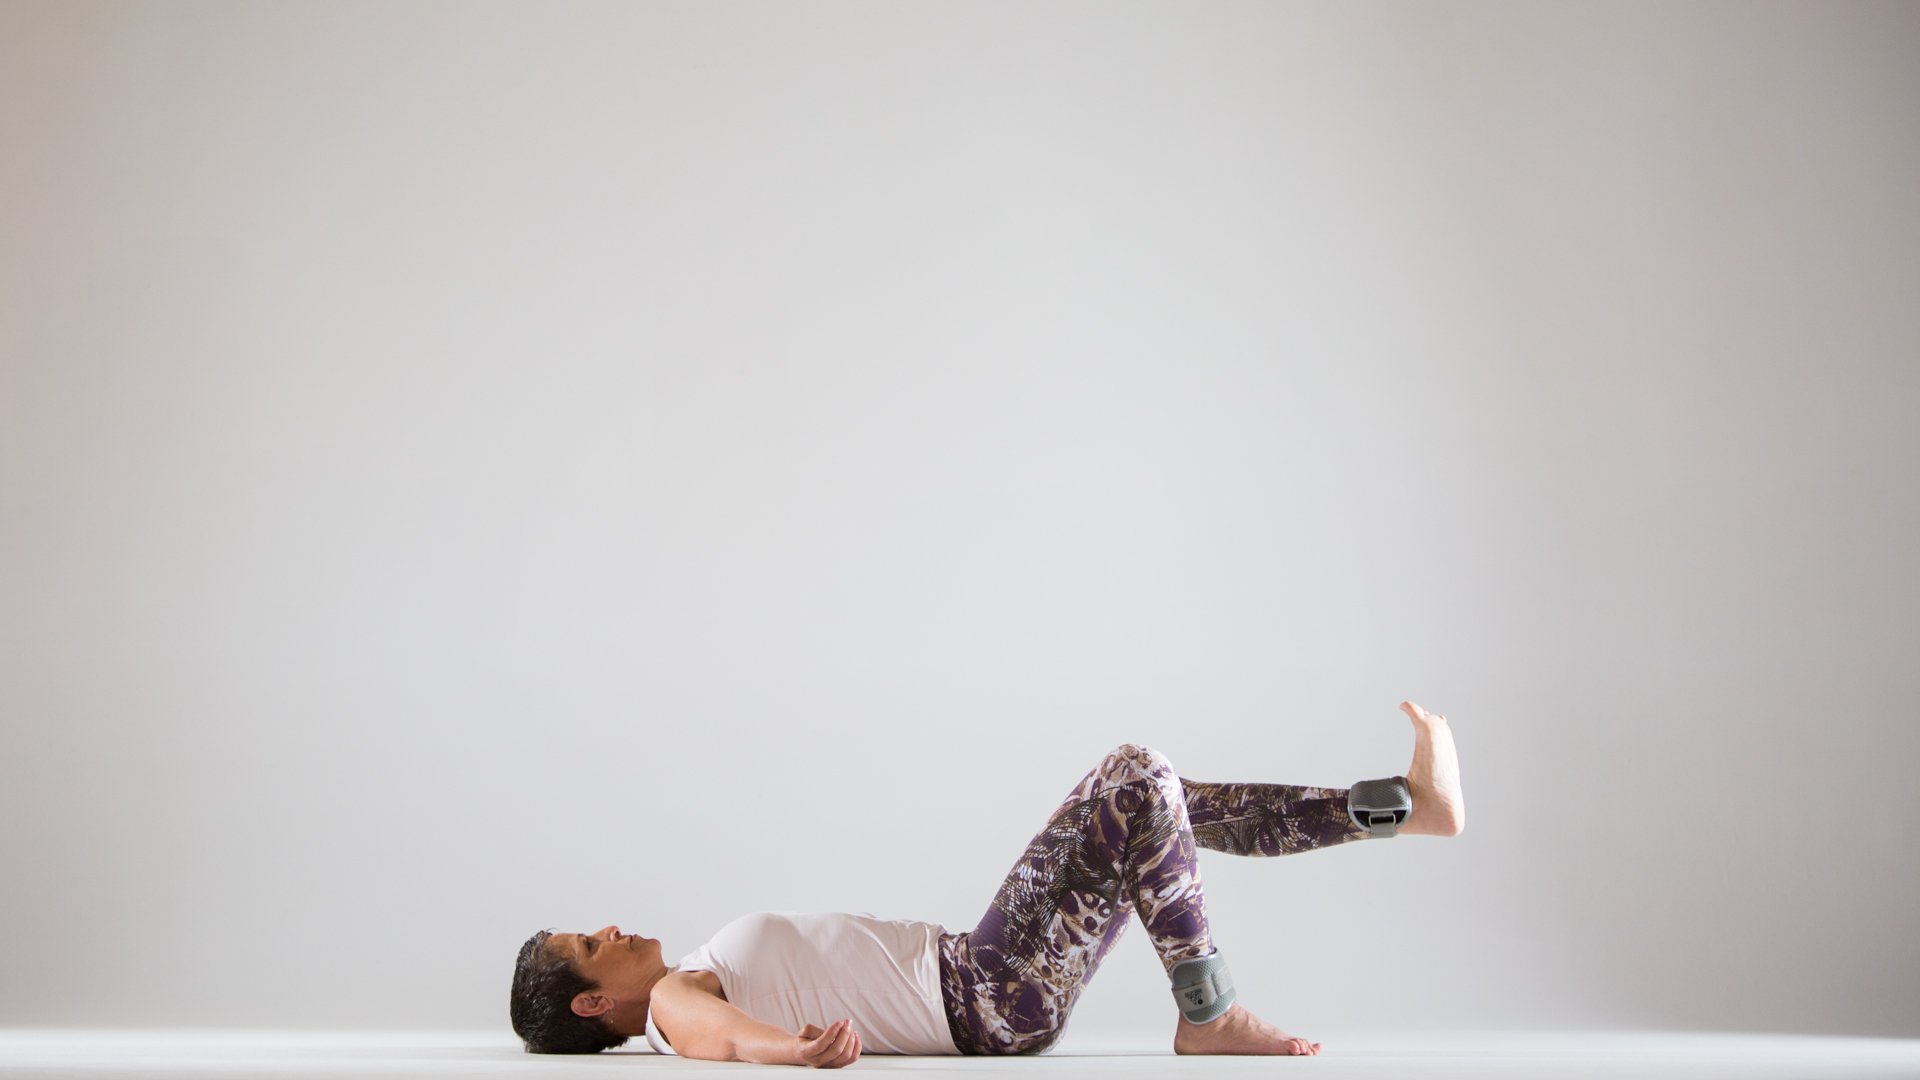
12. Hand to Big Toe Pose (with strap) In this hand to big toe pose, we can stretch the hamstrings without rounding the back.
Lying on your back with a strap nearby (a blanket under your head, if necessary, to lengthen the back of your neck), straighten your left leg on the floor and, foot flexed, anchor the back of your left heel into the mat.
Place a strap around the ball of your right foot and, holding one end of the strap with each hand, bring the right leg to 90 degrees, right foot flexed as if it were pressing into the ceiling.
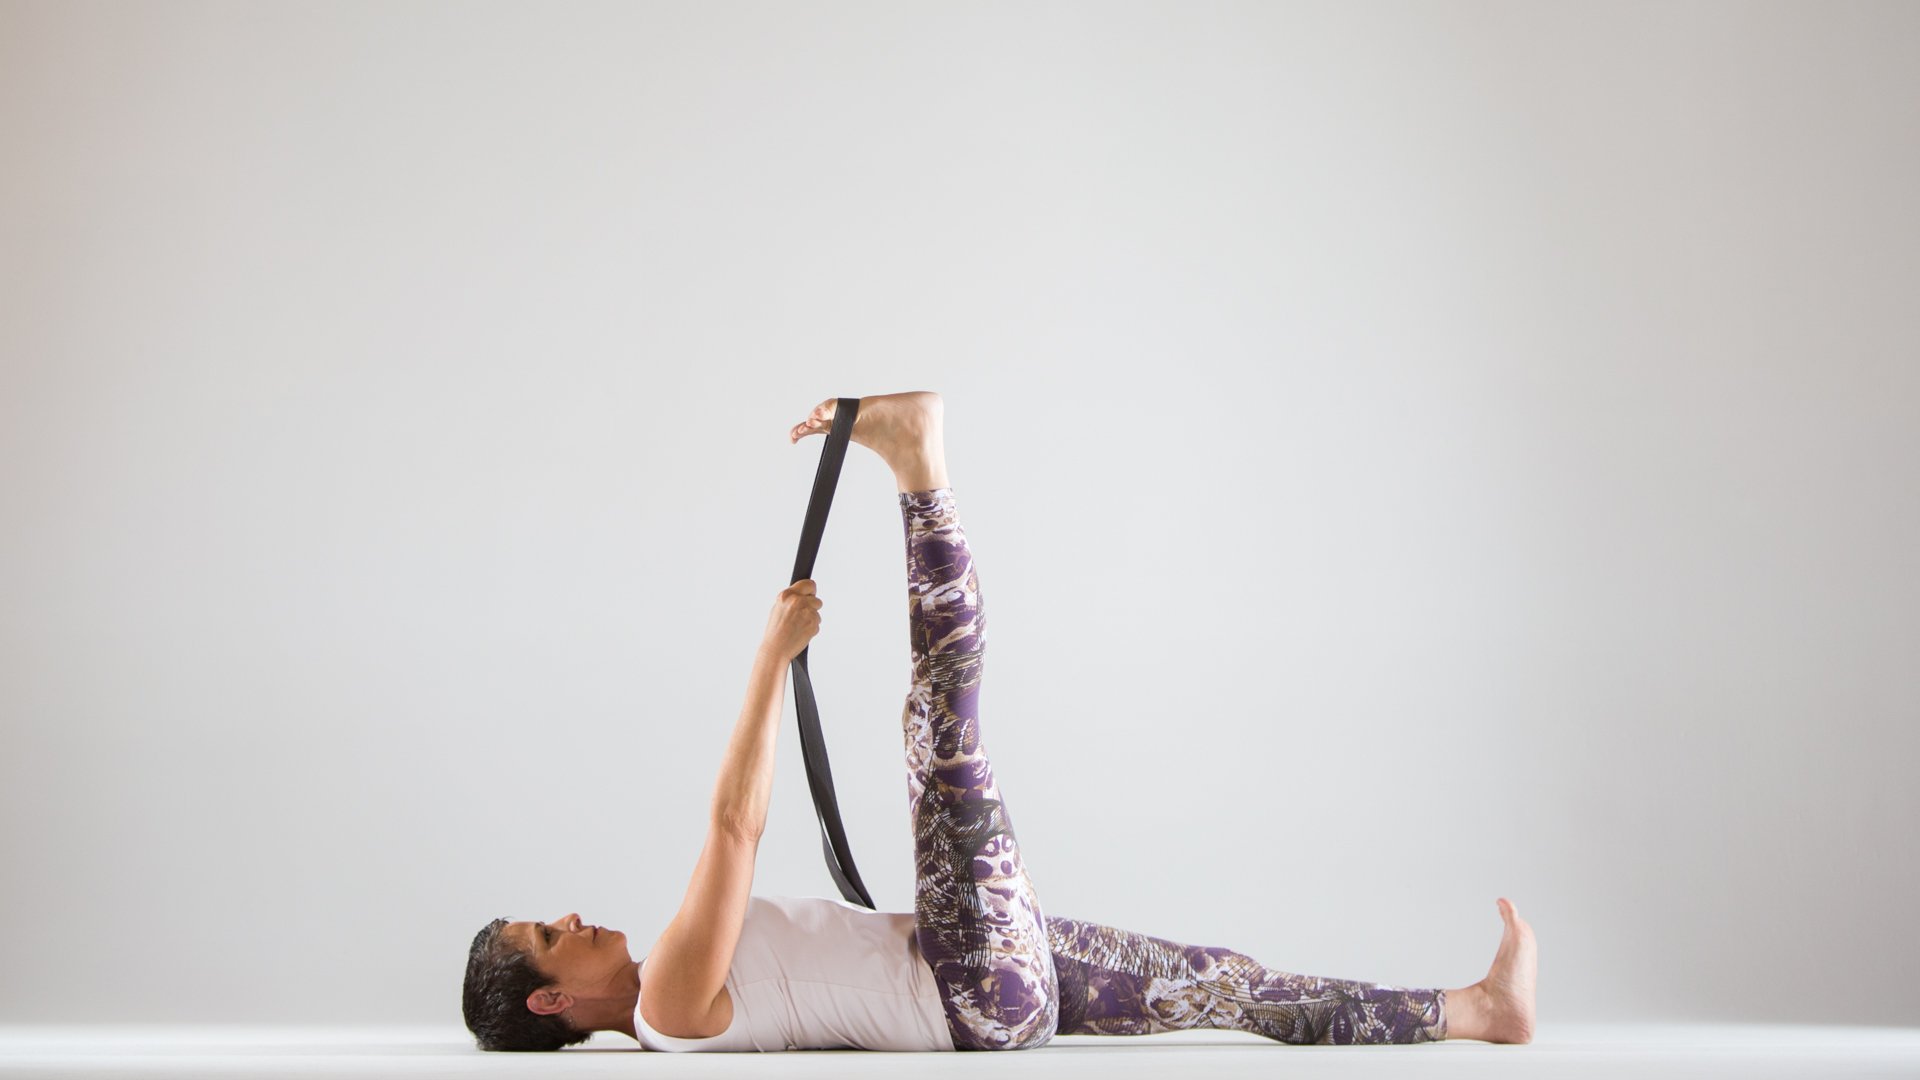
Tip your tailbone toward the floor until the lower back curves away from the mat. (If your lower back has flattened, instead of keeping your right leg vertical, lower it until you regain a gentle curve in your lower back.) Drop your shoulders toward the floor and lengthen from your left heel through the crown of your head.
Hold here for several breaths, then switch sides.
13. Windshield-Wipering the Legs A side-to-side movement of the knees can provide a twist gentle enough for many of those with osteoporosis.
Lying on your back, bend both knees, bringing the soles of your feet to the floor about shoulder-distance apart. Stretch your arms comfortably out to the sides, palms facing up. If the back of your neck has shortened, place a blanket under your head.
Inhale with your knees pointing up toward the ceiling. On an exhale, slowly lower both knees to the right. On an inhale, bring your knees back to center. On an exhale, lower both knees to the left.
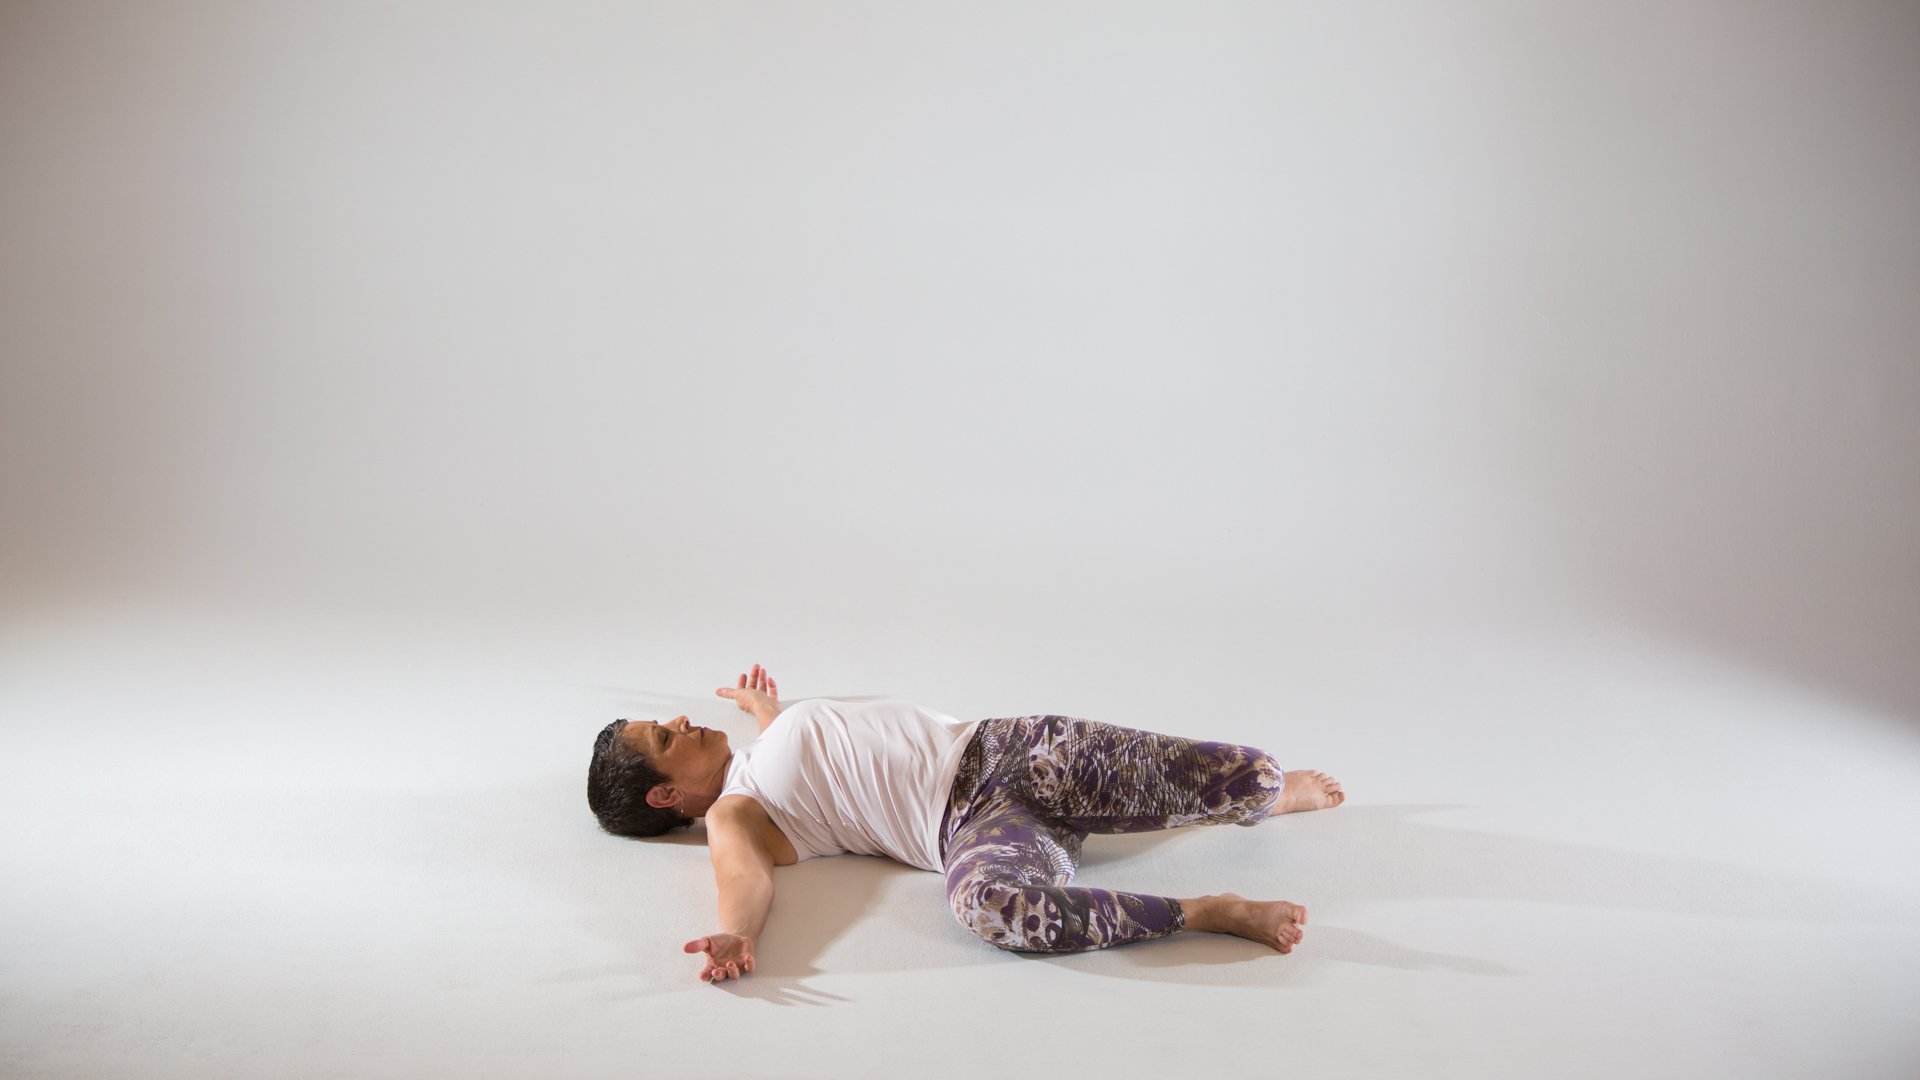
Repeat this gentle twisting movement several times, then hold on each side for several breaths, lengthening the tip of your tailbone and the crown of your head away from each other.
14. Bananasana We can encourage spinal flexibility with this gentle side bend.
Lying on your back with your legs outstretched, move your right foot a few inches to the right. Cross your left ankle over your right ankle. Interlace your hands behind your head and arc your upper body to the right as much as you need to in order to feel a gentle stretch along the left side of your body.

Allow your head to relax, placing a blanket under your arms if they don’t rest comfortably on the floor. Work to lengthen the spine, reaching the feet and the crown of the head away from each other. Hold here for several breaths, then switch sides.
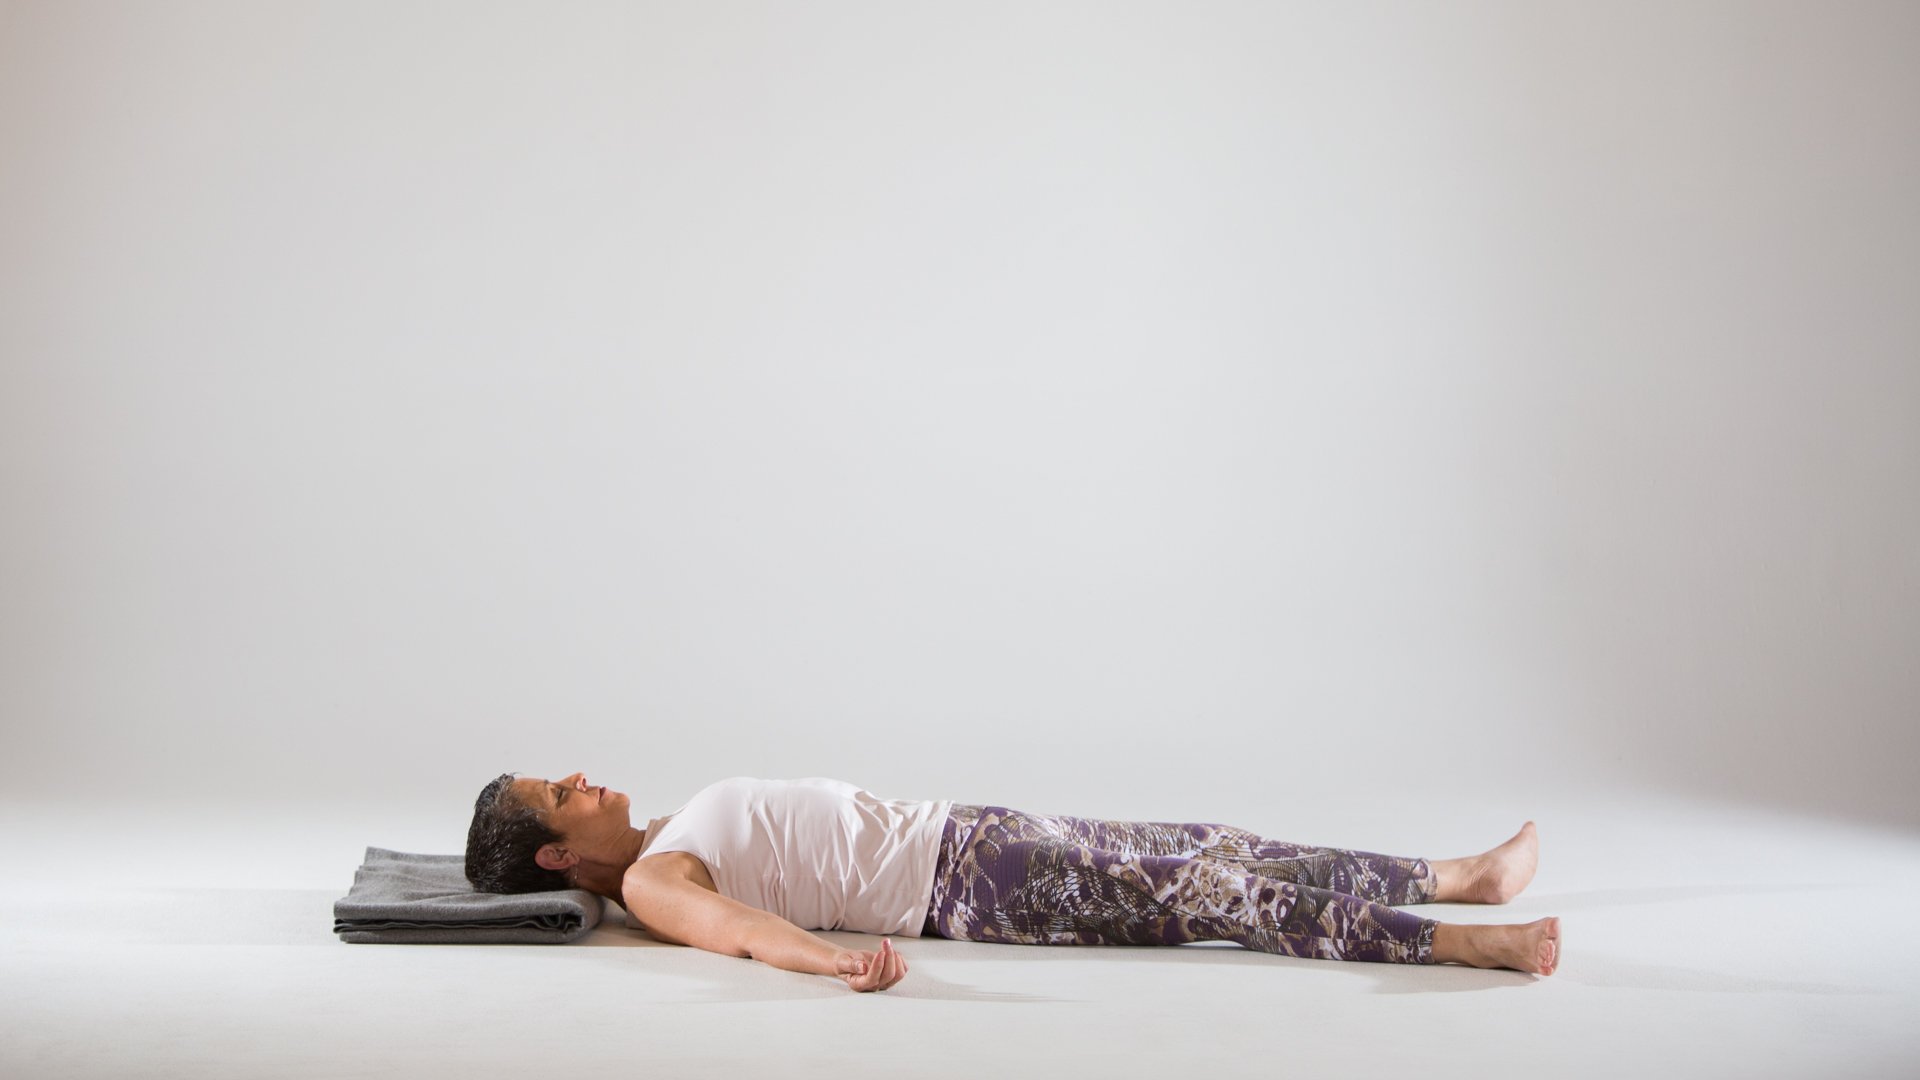
15. In savasana, we can relax while the support of the ground helps us find optimal spinal alignment. (Note: Those with osteoporosis should not hug the knees in or do happy baby before coming into savasana; these poses round the back, a movement that is not recommended for weakened bones.)
Sprawl out on your mat, allowing your legs to flop open away from each other and moving your arms a comfortable distance away from your body, palms facing up.
Let the weight of your head melt into the mat, putting a blanket under your head if the back of your neck has shortened. Give the weight of your shoulders over to the mat. Tip the tailbone down until the lower back curves away from the mat. Imagine that with every breath the crown of your head and the tip of your tailbone are drifting away from each other.
Spend several minutes here, allowing your relaxation to go bone deep.
When it is time for you to rise, ease yourself up into a seated pose like hero’s pose or any pose in which it is possible for you to elongate your spine.
Bring your palms together in front of your heart and notice the effects of this lengthening and strengthening practice in which you worked to align your spine and shoulders and channel weight through your limbs. Perhaps you feel lifted from within and a new sense of sturdiness seems to permeate your bones.